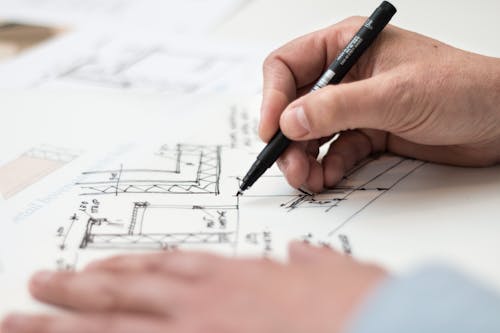
In the fashion world, new plans are introduced as hand-drawn representations before they’re really cut and sewn. First you draw a croquis, the model-formed figure that fills in as the base of the sketch. The fact isn’t to draw a sensible looking figure, however a clear canvas of sorts on which to show representations of dresses, skirts, shirts, frill and the remainder of your manifestations. Adding shading and subtleties like unsettles, creases and fastens assists with rejuvenating your thoughts.

What are fashion sketches?
Fashion sketches are outlines done by creators when they need to transform another attire thought into a genuine plan. They start with a format of a body and draw the piece of clothing onto it. This permits the creator to advertise his thoughts and plans and to feature innovation and style. There are two different ways to introduce style draws. Pictures can be made by utilizing PC programming or they can be drawn out freehand.
The layout an originator utilizes is similarly as significant as the piece of clothing itself. Layouts are utilized as aides and the architect should discover one that improves the vibe of the article of clothing. Hairdos and various adornments may likewise be incorporated onto the format to add a sprinkle of shading or to underscore a style. Creating figure models for a specific article of clothing is likewise significant when a fashioner picks a layout for style portrays.
The creator should incorporate the surface and shade of the material being utilized to make the piece of clothing. Design outlines must be attracted three-dimensional representations and this is finished by concealing in regions to show various surfaces. There are normal folds in attire when it is worn on the body and the fashioner needs to accentuate these folds with the goal that the piece of clothing can be completely perceived. When getting ready design draws the piece of clothing must be given both the front and back perspectives.
Rules to draw fashion sketches
Start to a sketch

1. Assemble materials.
Pick a hard lead pencil (H pencils are ideal) that makes light; crude denotes that are anything but difficult to delete. Imprints made with these pencils additionally don’t indent the paper, which is useful when you need to add tone to the picture. A decent quality eraser and thick paper are likewise significant materials to have on the off chance that you need your sketch to look proficient. In the event that you don’t have the correct sort of pencil, you can do a sketch with a number
2. Make sure to make exceptionally light stamps
Attracting pen isn’t prudent, since you won’t have the option to delete. You will likewise require hued markers, inks or paints to outline your garments plans.
3. Choose a posture for your croquis.
The model for your plan, called a croquis, should be attracted a represent that will flaunt the things best. You can show the model strolling, sitting, bowing, or in some other position. As an apprentice, you might need to begin with the most well-known posture, which is a runway sketch that shows a model standing or stepping on a runway. This is most effortless to draw and it will permit you to delineate the entirety of your plans in full view. Since you need to show your plans such that makes them look proficient and engaging, it’s essential to display them on croquis that are proportional and all around drawn.
Many style artists work on attracting several croquis to consummate their capacity to make an assortment of stances.
Drawing a Croquis
1. Draw the equilibrium line.
This is a the principal line of your sketch, and it speaks to your model’s focal point of gravity. Draw it from the highest point of the head to the tip of the toes, along the foundation of your croquis. Presently attract an oval to speak to the head. This is the base of your croquis, and from this, a relative drawing can be made. You can think about the croquis as the skeleton of the model.
The equilibrium line should be a straight vertical line, regardless of whether you need the model to present in an inclining position. For instance, in the event that you need the model to be presented with her hips inclined marginally to one side, draw a straight equilibrium line in the page. You need this line to stretch out from the highest point of the model’s head to the ground that she is remaining on.
2. Begin drawing the pelvic zone first.
Draw a square with equivalent side lengths on the equilibrium line just beneath the center, where the pelvis is normally situated on the body. Size the square as indicated by how wide you need your model to be. A more slender model would have a more modest square width than a larger measured model. Remembering your ideal posture, tilt this pelvic square either left or right. For instance, on the off chance that you need your model’s hips skewed to one side, tilt the square marginally to one side. On the off chance that you need an ordinary standing model, simply draw the square upstanding with no points left or right.
3. Draw the middle and shoulders.
Expand the middle lines upward from the two corners of the pelvic square. The middle ought to broaden upwards, bowing in halfway at the midsection and reaching out again at the shoulder. Similarly as with a genuine human body, the shoulders should be similar width as the hips, or the highest point of the pelvic box. At the point when you’re done, the middle should seem as though an ordinary middle you would see on a body. Allude to pictures of models in magazines or notices for reference. Notice how the midriff is more modest than the lower part of the body and hips. The middle should quantify around two heads long.
4. Sketch the neck and head.
The model’s neck should be a third the width of the shoulder and a large portion of the length of a head. In the wake of drawing this, sketch in the head, which should be in relation to the body. The greater the head, the more adolescent or more youthful the model looks. You can delete the underlying oval you attracted to speak to the head.
Draw the head so it looks normal with the posture you have chosen. You can tilt it somewhat up or down, or to one side or left.
5. Fill in the legs.
The legs should be the longest piece of the body, the length of around four heads. The legs are likewise distributed into two pieces, the thighs (from the lower part of the pelvic box to the highest point of knees) and calves (from the lower part of knees to start of lower legs). Remember that style artists for the most part misrepresent the model’s stature by making her legs longer than her middle
The highest point of every thigh should be around a similar width as the head. Tighten the width of every leg from the thigh to the knee. When you arrive at the knee, the leg should be 33% the width of the greater bit of the thigh. To draw the calves, tighten to the lower legs. Every lower leg should be around one fourth the widths of the head.
6. Get done with the feet and arms.
The feet are generally limited. Draw them like extended triangles that are about a similar length as the head. Develop the arms like the legs, tightened toward the wrists. Make them longer with respect to the middle than a genuine individual’s arms would be, since this gives a more adapted impression. Add the hands and fingers last.
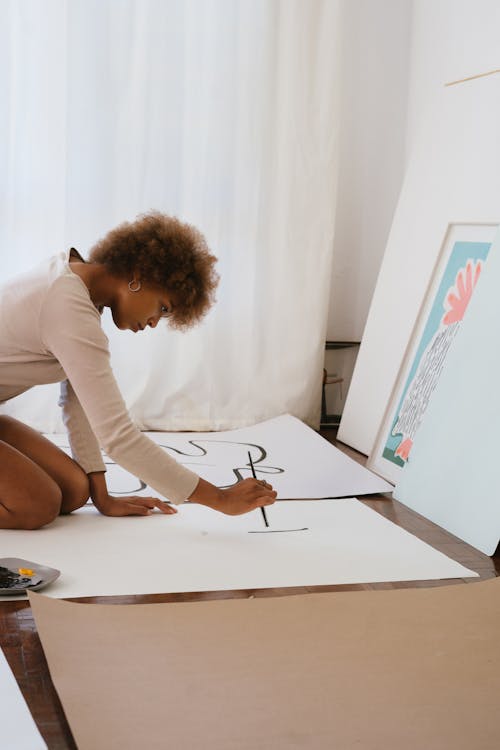
Drawing clothes and accessories
1. Show your unique plan.
Consider what look you’re attempting to make, and speak to it down to the last detail. In case you’re planning a dress, for instance, add designs, unsettles, text, bows, etc to make a lovely piece. Zero in on the components of your plan that are interesting, and incorporate suitable frill so the style you’re going for is clear.If you need some new thoughts or don’t have a clue where to begin, look into design patterns on the web or in magazines for motivation.
2. Sketch the garments strongly.
Since the reason for a style attracting is to grandstand your plan thoughts, utilize a bolder hand when you’re drawing the apparel. Sketch the garments so they seem to hold tight the croquis in a practical manner. There should be wrinkles around the elbows and at the midsection, just as close to the shoulders, lower legs and wrists. Consider how apparel holds tight an individual and reproduce that on your model.
Recall that various textures and structures lie on the body in an unexpected way. On the off chance that the texture is slim and luxurious, it will lay on the body and float away, practically surging. On the off chance that the texture is thick similar to denim or fleece, it will be boxier and will show less state of the body (think denim coats). Attempt to delineate the surface of the texture you’re drawing, regardless of whether it’s smooth, coarse, hardened or delicate. Add subtleties like sequins and catches to make the drawing look more practical.
3. Figure out how to draw creases, wrinkles and creases
Utilize various kinds of lines to make various wrinkles in the texture you’re drawing. Realizing how to draw overlays, wrinkles and creases will assist you with delineating the structure of the piece of clothing. Folds can be drawn utilizing free, wavy lines. Utilize roundabout examples to show wrinkles. Take out a straight edge to draw accurate creases.
4. Delineate examples and prints.
On the off chance that your plan incorporates a designed or printed texture, it’s critical to precisely outline how it will look on a model. Start by drawing the diagram of the designed piece of clothing, for example, a skirt or shirt. Gap it into a lattice with various areas. Fill in the areas each in turn with the example on the texture. Focus on how overlap, creases and wrinkles change the presence of an example. It might have to twist or be sliced off at specific focuses to look exact.
Set aside the effort to attract the example detail and ensure it appears to be identical over the whole lattice.
5. Conclude the drawing with concealing, ink and shading.
Utilize thick dark ink or paint on the lines that you need to keep. You can eradicate the body molding lines and any wanderer pencil marks now. At long last, cautiously shading in the apparel utilizing tints you need your plans to have.
Frequently asked questions
What is style design sketch?
In style design portrays the ability to draw silk and silk textures is significant since these are among the… LEARN HOW TO DRAW FASHION MODELS. Figure out how to draw design figures bit by bit. With my instructional exercises you will figure out how to draw design croquis with ideal extents of the body and face.
How fashion originators draw?
Fashion planners have an interesting method of drawing. Their models are basic and exquisite with a large portion of the detail going into the dress. Regardless of whether it’s for a particular work or for no particular reason, drawing like a creator can prompt some perfect craftsmanship. Sketch a hover for the head. Draw the state of the face. Add the rules for the body.
What is the motivation behind a design drawing?
Since the motivation behind a style attracting is to grandstand your plan thoughts, utilize a bolder hand when you’re drawing the attire. Sketch the garments with the goal that they seem to hold tight the croquis in a reasonable manner. There should be wrinkles around the elbows and at the midsection, just as close to the shoulders, lower legs and wrists.
Conclusion
One of the foundations of design school is figuring out how to outline style figures. Nonetheless, as design school understudies learn, there’s a major distinction between appropriate body extents in workmanship and in style. In workmanship, the body’s extents are estimated in heads. The normal figure is around 7-7 1/2 heads, including the genuine head, tall.
In any case, in design, the body extents are prolonged to all the more likely speak to the models, who are better than expected in tallness. Along these lines, the figures become 8-10 heads tall. In spite of the fact that the essential extents of the design figure are about the equivalent — plus or minus 1/4-1/2 of a head — each artist adds their own style to the recipe.