Sugar Wax Recipe

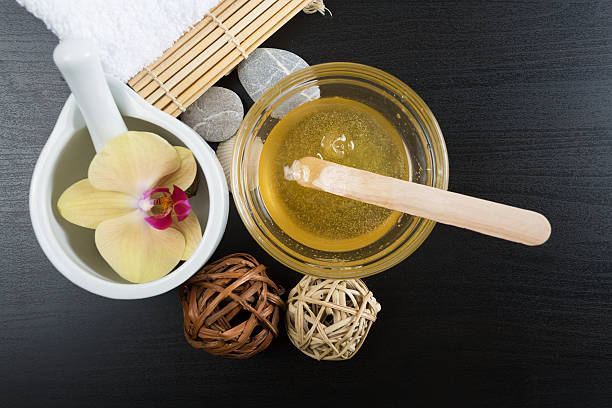
Sugar wax recipe is so handy, economical, and time-saving. The main ingredients used in the sugar wax recipe are sugar – brown or white – water and lemon juice. Take 1 cup of cane sugar, 1/4th cup of lemon juice, and 1/4th cup of water. Take all those ingredients in a medium-sized pan. Heat at the normal flame and stir softly. When honey color is obtained, remove the pan from the stove and let it cool.

Sugar wax recipe

1. How to make sugar wax?

Sugar wax can be prepared at home by using some basic ingredients easily available anywhere. Although laser hair removal is also a good option for hair removing, if you don’t want to go for it, you can use sugar wax at home.

1.1. Ingredients for sugar wax recipe

There are three main ingredients used in the sugar wax recipe and they are present in your kitchen almost always. These are:

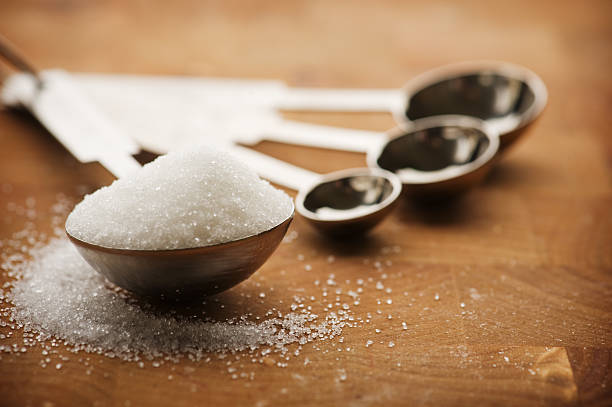
  1. Granulated white sugar – 200 g or 1 cup
  2. Lemon juice – fresh or bottled – 60 ml or ¼ cup
  3. Water –60 ml or ¼ cup
  4. Table salt – ½ tsp

1.2. Preparation of sugar wax

Sugar wax is prepared by following the sugar wax recipe step by step. These steps are given as:

:one: Choosing the suitable sized pot

  • Take a normal-sized saucepan that is used usually in the kitchen.

  • Medium-sized pan should be taken to avoid the outburst of sugar bubbles while boiling.

  • If you have a non-stick pan that will be great.

:two: Mixing of ingredients

  • Place the pan on the stove and all three ingredients – sugar, water, and lemon juice – into it. First, add sugar and then the liquid ingredients.

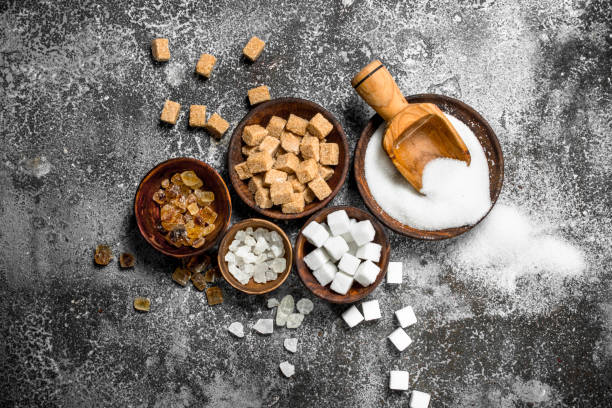
  • If you want to use brown sugar, that’s fine but avoid using the sugar in powdered form. The granulated form is best for this recipe.

:three: Boil the ingredients

  • Turn on the flame and start heating the ingredients at a high temperature initially. Wait until it starts boiling and keep stirring while boiling.

  • Although it is said to not stir too high to prevent crystallization, yet stirring gently is necessary to melt and mix the sugar portion.

:four: Reduce the flame

  • At the point where the mixture of sugar wax starts to boil, you should cut down the flame to a medium level. Keep stirring it at times until becomes thick enough.

  • It should not become too concentrated to be used. Wait until it reaches a suitable consistency to be applied conveniently. If wax gets too hard, you will not be able to use it.

:five: Color of sugar wax

  • A good color to be attained for sugar wax with the above-mentioned ingredients is honey-colored or slightly lighter than that. Consistency should be just like sugar syrup.

Sugar wax

  • If it gets darker it means you have overheated the wax. Keep in mind, you can heat again if it requires but if you overheat the sugar wax, you can’t reverse it. So, be careful while heating.

  • Remove the pan and let it cool

  • Switch the flam off and remove the pan from the stove. Let it cool until it reaches a touchable temperature.

  • It will be slightly transparent and is now ready to be used or saved in a jar.

:six: Save in a jar

  • Best type of bottle or jar to save the sugar wax is a wide-mouthed container so that you can take out the wax conveniently.

  • Moisturize your hand with water and roll the sugar wax like a softball. Now put it in the jar and save it for future use.

:white_check_mark: Summary
Granulated sugar, lemon juice, salt, and water are used in the preparation of sugar wax using a sugar wax recipe. All ingredients are heated together until the color turns to a golden brown. It can be used immediately and saved for later use.

Brown sugar Lemon for sugar wax

2. How to use sugar wax?

To use the sugar wax after preparing it y sugar wax recipe, you should follow the given steps:

  1. Sugar wax should be used when it’s not fully cooled and is still warm yet bearable.

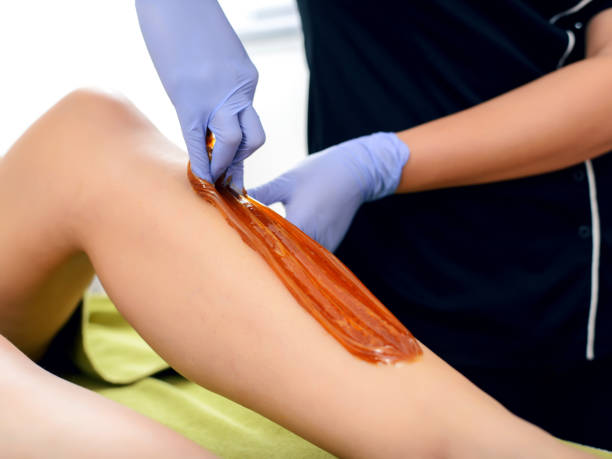
  2. Take out a suitable amount of sugar wax by using your hand and roll it in the palm just like a ball.

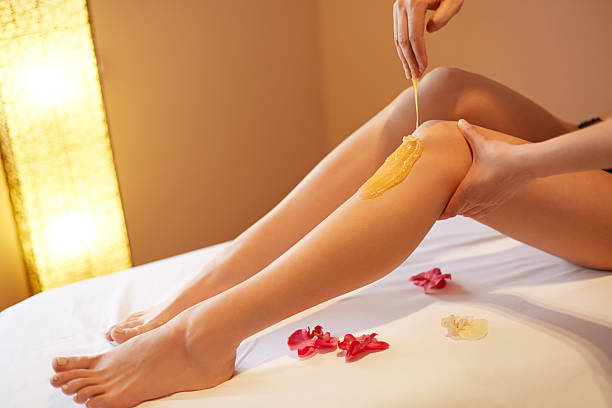
  3. Wax can be applied either by hand or by spatula. Spread the sugar wax like a thin strip at the area from where you want to remove the hair.

  4. Thickness of the strip should be 0.5-0.6 inches.

Pro tip 1 :pencil2:
Don’t apply the sugar wax in the direction of hair growth. Always do this opposite to the direction of hair growth for good removal.

  1. Avoid using as much longer and wider strips, always do this in small steps, covering smaller areas of skin – approximately reaching 3-4 inches in length and 2 inches in width.

  2. Now, it’s the step that involves some pain, but don’t worry it will not cause much pain.

  1. Hold the one edge of the sugar wax strip in your fingers and get ready to pull it in a single movement.

  2. Pull the sugar wax strip in the direction opposite to the hair growth.

Pro Tip 2 :pencil2:
Paper or muslin cloth strips can e used instead of puling the sugar wax strip with hand. It will smoothen the process.

  1. You can repeatedly use the same wax strip until it loses its adhesiveness. Repeat for all the body areas.

  2. Be careful while using sugar wax for underarms or bikini area as they are sensitive parts.

  3. Hold the skin at one edge and then pull the strip while using it in sensitive body areas.

  4. Save the remaining portion of sugar wax in a wide-mouthed container and keep it in the refrigerator. It may require slight heating before use again.

See also :eyes:

:ballot_box_with_check: Bikini laser hair removal
:ballot_box_with_check: How to make lip gloss
:ballot_box_with_check: Avocado oil nutrition facts

3. Sugar wax recipe without lemon

  1. Although there are a lot of wax types are available in the market including sugar wax and lemon wax. These waxes are ready to use the form and you have just to apply them.

  2. But using a home-made sugar wax prepared by a proper sugar wax recipe is yet another satisfying thing.

  3. By using sugar wax, you can forget the question that how long it takes to grow the hair again, as it stops the ingrown hair.

  4. Sugar wax – also known as sugaring - preparation doesn’t take much time and there is not a list of ingredients involved in preparation.

3.1. Ingredients for sugar wax without lemon

Ingredients for sugar wax recipe without lemon are given below:

  • Granulated sugar – one cup
  • Water – 1/4th cup
  • Table salt – ½ tsp
  • Vinegar – cider or white – 2 tsp
  • Fragrance – few drops if you don’t like the vinegar smell

3.2. Recipe for sugar wax without lemon

:small_blue_diamond: Take a medium-sized pan and place it on the stove and add granulated sugar – not powdered – vinegar and water in the pan.

:small_blue_diamond: Turn on the flame and keep heating the ingredients at medium flame.

:small_blue_diamond: Stir continuously yet gently for proper mixing of the ingredients

Vinegar for sugar wax without lemon

:small_blue_diamond: Let all the sugar be dissolved and wait until the mixture reaches a thick consistency.

:small_blue_diamond: When it starts boiling, observe more carefully so that it may not excessively thicken.

:small_blue_diamond: Take a flat tray and sprinkle water over it. When the mixture turns honey-colored, remove the pan and pour the sugar wax over the tray.

:small_blue_diamond: Take a wooden spatula or kitchen spoon to roll the hot sugar wax in a round shape, before it gets hard.

:small_blue_diamond: When the sugar wax ball reaches a bearable temperature, hold it in a moisturized hand and start to stretch and pull the sugar wax.

:small_blue_diamond: Separate the required portion of sugar wax from the whole mass and store the remaining sugar wax in the refrigerator.

:small_blue_diamond: Use a wide-mouthed jar to store the sugar wax made by sugar wax recipe without lemon and it can e used for 2 months.

:white_check_mark: In short
If lemons :lemon: are not available you can go for cider vinegar as a replacement. People who hate the vinegar smell can add few drops of lavender oil in wax. The recipe follows the same steps as does for normal sugar wax.

4. Sugar Wax Recipe with guar gum

Sugar wax can be prepared at home with or without the use of lemon. If you are allergic to lemon, you can go for cider vinegar as an alternative for lemon juice. Sugar wax can also be made by adding guar gum in the sugar wax recipe.

4.1. Ingredients

For Sugar wax recipe with guar gum, following ingredients are used:

:heavy_check_mark: White granulated sugar – one cup
:heavy_check_mark: Water – 1/4th cup
:heavy_check_mark: Salt – one tsp
:heavy_check_mark: Lemon juice :lemon: – 2 tsp
:heavy_check_mark: Guar gum – ½ tsp

4.2. Recipe

  1. Take a pan and add sugar, lemon juice, salt, guar gum, and water in it.

  2. Heat it at medium flame and wait for the sugar to get melted.

  3. Stir with a wooden spatula for thorough dissolution of sugar.

  4. When the sugar wax reaches a thick syrup-like consistency with golden brown color, remove the pan from the stove.

  5. It will be gummy material when gets cool.

  6. You can make a ball of sugar wax with guar gum and use it the same as the plain sugar wax.

5. Sugar wax recipe with honey in the microwave

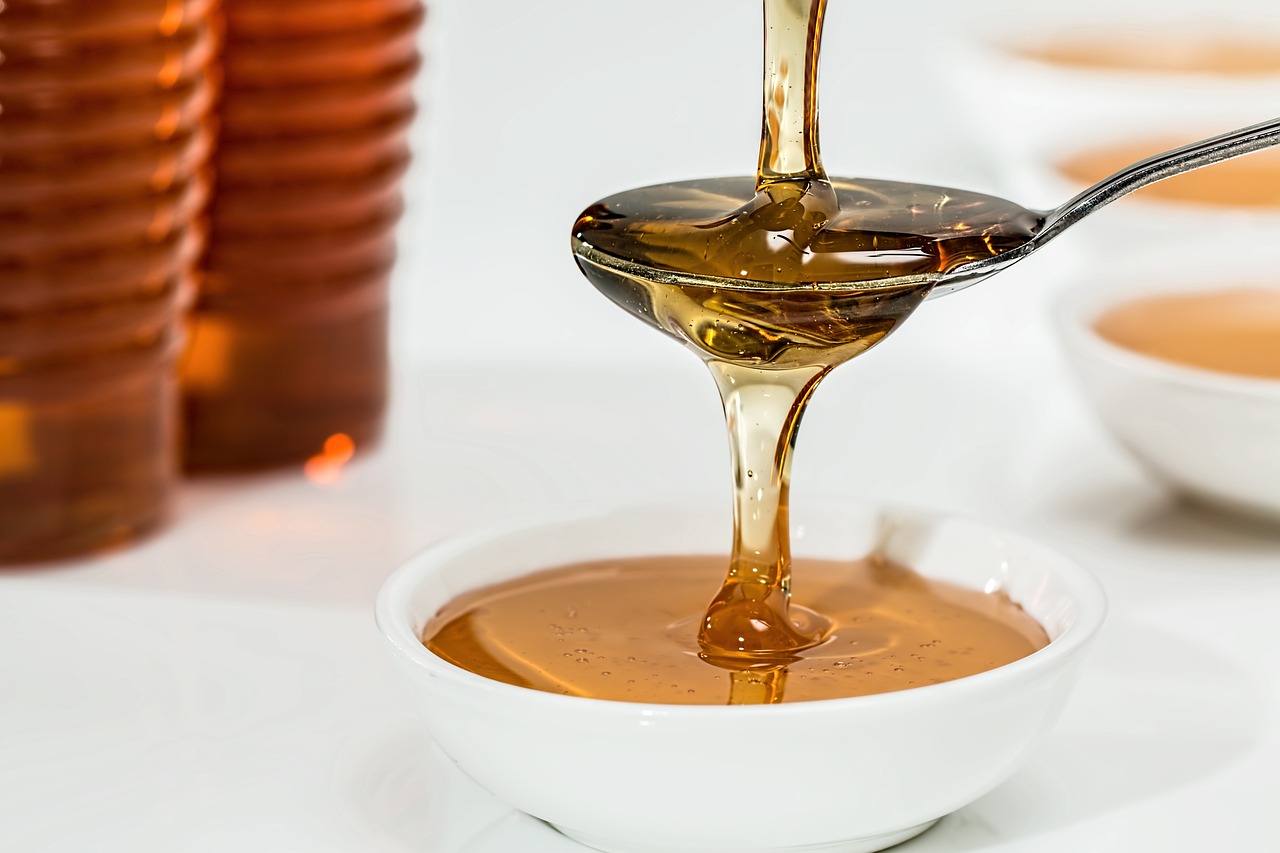
Sugar wax with honey is yet another recipe for facial or body hair removal. Sugar wax with honey just has honey as an additional ingredient. Requirements for a sugar wax recipe with honey are listed below.

Requirements

  • Granulated sugar – white or brown – one tsp
  • Raw honey – one tablespoon
  • Water – one tsp
  • Microwave
  • Heat resistant bowl
  • Mixing spatula

Honey for sugar wax recipe

Recipe

  1. Take all ingredients in heat/microwave resistant bowl and keep in microwave Heat for about a minute and the mixture will start boiling and bubbling.

  2. It will have a golden-brown color after this.

  3. Take it out of the microwave and let it cool.

  4. When it reaches a touchable temperature, it is ready to be used for hair removal.

Pro tip :pencil2:
You can also add lemon juice :lemon: in the above-mentioned recipe and it will enhance the effectiveness of sugar wax.

6. Best at-home sugar waxing kits

Although sugar wax can be prepared at home with 3 to 5 ingredients and in a very short time, yet you can also buy it in ready-to-use form. Best sugar waxes to buy are:

Name Company Wax type Price
:one: Organic sugar hair removal wax :star: PARISSA Hot wax with strips, Best for bikini hair $20
:two: Blue wax :star: CIREPIL Hard wax $23.19
:three: Ultimate roll-on wax :star: NAIR Best for underarms hair removal $ 37.0
:four: Face wax hair removal strips :star: GLEE Best for hair removal, berry-scented wax $ 9.0
:five: Natural hair removal gel kit :star: ■■■’S No-heat wax, best for legs and arms $11.48
:six: Body wax strips :star: ■■■’S Best strips for beginners $9.48
:seven: Insta wax strips :star: SALLY HANSEN No heat strips $11.88
:eight: Brazilian and bikini wax kit :star: ■■■’S Best hard wax $12.50

:point_right: Read also :books:

:ballot_box_with_check: How to be pretty
:ballot_box_with_check: Biologique recherche P50
:ballot_box_with_check: How to start your own salon business

7. Frequently asked questions

Sugar wax recipe is widely searched and asked for the recipe and people have certain queries about it. Some of these questions have been answered below:

1) Is sugaring better than waxing?

  • Sugar wax recipe has explained all the requirements to prepare a sugar wax at home. Sugaring is considered a better way to remove unwanted hair as compared to waxing.

  • Sugar wax doesn’t stick with the skin, instead it adheres with the hair and ■■■■ skin cells. On the other hand, the wax sticks all over the outer layer including the skin and hair.

  • So, when the strip is pulled off, it hurts the skin more as compared to the sugar wax.

2) Can I sugar wax myself?

  • It’s so easy to use the home-made sugar wax by yourself, for facial or body hair removal. However, sugar wax should be used when the hair length is less than or about ½ inch.

  • If the hair length is more than half-inch, it will hurt more while pulling the strip of sugar wax. Just spread the sugar wax prepared by sugar wax recipe over the area with hair.

  • Always spread the wax in the direction opposite to the hair growth. After spreading properly, hold the strip with fingers and pull off opposite to the direction of hair growth.

3) Can I use sugar wax for Brazilian?

  • Sugar wax prepared at home by using sugar wax recipe is so convenient and beneficial to use. By using sugar wax for Brazilian including all other body parts is the best way to remove hair.

  • This method of Brazilian hair removal is best as it keeps you away from any skin trauma or other skin damage. It also helps to delay the hair growth once you wax them with sugar wax.

Conclusion

:white_check_mark: Sugar Wax Recipe is easily applicable and doesn’t require a list of ingredients. It’s the best way to remove the body and Brazilian hair with no risk of skin damage.

:white_check_mark: Granulated sugar, honey, lemon, water, salt, vinegar, and guar gum are the ingredients that are used in different types of sugar wax.

:white_check_mark: Sugar wax can be made either on the stove or by using a microwave. It can be stored in a refrigerator by putting it in a wide-mouthed jar for use for up to 2 months.

:white_check_mark: Ready to use waxes are also available if you have some problem with preparing a sugar wax at home by using a sugar wax recipe.

References

DIY Sugaring "wax" that really works | ■■■■■ truth beauty
How to Make Sugar Wax: Simple Recipe & Sugaring Tips
How to Make DIY Sugar Wax for Easy, At-Home Hair Removal
Homemade Wax for Hair Removal: Ingredients, Recipes, Tips & More

Related articles

Best home remedies for oily hair
Best home remedies for dry hair
How much is Botox
Farmasi make up
Oribe shampoo
Henna eyebrows
Jaw fillers

1 Like

To get your skin waxed at a salon can be costly! Alternatively you can make sugar wax at home with 3 simple ingredients and can do your waxing at home. All you need for this is granulated white sugar, lemon juice, and water. Sugar wax is also causes less pain than usual hot wax because it does not remove the hair follicle. This makes it a good option for sensitive skin type.

Sugar wax is actually an all natural waxing solution that has been used for many years removing unwanted hair from various body parts with a very nice and clean finish removing hair from their roots making hair growth slower and thinner. Other benefits of sugar waxing are the exfoliating and hydrating results, which are not normally created after waxing or shaving. Since shaving can cause ingrown hairs in coarser hair types, whereas sugaring softens the hair follicle, which eventually reduces hair growth. According to Gallo, the results axing of sugar waxing can last up to 28 days and the advantage is that the sugar waxing can be done with ingredients you mostly have in your home already.

Types of homemade wax

There are many different types of waxes used for body waxing. Most of the wax ingredients can be purchased from grocery stores, special salon stores or online.

Hard wax

Hard wax is good for small and sensitive areas of body upper lips, eye brows and bikini line areas. The major ingredients of hard wax are beeswax and rosin. Other beneficial ingredients include added oils and vitamins. Hard wax does not require removal strips.

You can make your own hard wax by purchasing beeswax and rosin. The ratio of mixing is usually four parts rosin to one part beeswax. A small amount of olive or coconut oil can also be added.

Hard wax can be melted for 15 to 20 minutes on warmer. After melting, it is kept warm for further use

Soft wax

Soft wax is best for large areas, such as legs, arms, and other non sensitive body parts. Wax strips or cloths are required to remove sot wax. It includes ingredients that are similar to hard wax like rosin, oils, and other additives. Ingredients used to make sugar wax include granulated white sugar, lemon juice and water. Soft wax can be melted in the warmer in similar way as hard wax.

Sugar wax

Sugar wax can be used for all areas and skin types. Sugar waxing or simply sugaring is becoming a popular waxing option in recent years, because it is thought to be a more natural and less painful than soft and hard waxing.

Chocolate, fruity, or honey wax

These types of wax can be used on all areas, especially smaller regions as well as for sensitive skin. These waxes use the same base as for hard or soft wax, but they are supposed to be more beneficial to skin.

Cocoa is rich in anti inflammatory components, while fruits contain plenty of antioxidants, vitamins and minerals. Honey is also loaded with antioxidants and anti-inflammatory nutrients. These waxes can be prepared at home using following instructions.

Usual hard or soft wax recipe is followed.

  • For chocolate wax 10 to 20 grams of organic cocoa powder is added.
  • For fruit wax 10 to 20 g of pure fruit juice or powdered fruit mix is added.
  • For honey wax 10 to 20 g of pure honey is added.

Chocolate, fruit, or honey wax can be used in the same way as hard or soft wax.

Ingredients of Sugar Wax

These are all the ingredients you need for an at home sugar wax recipe.

  • 1 cup (200gram) of white sugar
  • 1/8 cup (30 ml) of lemon juice or apple cider vinegar
  • 1/8 cup (30 ml) of warm water

Preparation

  1. First of all place a medium sized pot on the stove after adding all ingredients to the pot.
  2. Bringing the mixture to a boil at high flame, make sure to keep stirring frequently to avoid its burning.
  3. Reduce heat to medium when the mixture starts bubbling, keep continuous stirring.
  4. Remove the pot from stove when the mixture has turned golden brown. The consistency of the paste should be like hot syrup. If it becomes thick like honey, heat it a bit longer.
  5. Transfer it while hot to a bowl and let it to cool for 30 minutes.

It is recommended to use white sugar instead of brown for making sugar paste, as it is hard to observe the color change with brown sugar and also it hardens much rapidly.

How to Prepare Your Skin before applying wax

Cleanse the area to be sugared with a natural soap as well as gently exfoliating. The area should be clean and free of lotions or oils. If your skin is oily, you can wipe away excess oil. If you have sporting sunburned skin or have irritated skin with open sores then avoid applying wax to those areas. Also you should stop using ■■■■ or topical acne and retinoid medication no less than six days before sugaring.

How to apply Your homemade Sugar Wax

Your homemade sugar wax can be applied on face or body as the length of the hair has become at least a quarter inch. Here is how to use the paste without using cloth strips.

  1. Hold the wax with your finger tips and thumb.
  2. Spread the wax in the direction of hair growth.
  3. Drag the skin tightly using your other hand and pull off the wax with a fast movement in the opposite direction.
  4. Always tear off the wax parallel to the skin never in an upward movement.
  5. Store the extra paste it in a plastic container at room temperature.

Tips for Aftercare

After removal of the hair, remove any residual wax on your skin with a wax remover or with warm water and a cotton cloth. An antiseptic cream can be used regularly for one to two days of post sugaring. Coconut oil is used to reduce the acidity from the lemon juice and to soothe the skin. Vitamin E oil can also help to decrease post waxing inflammation.

Benefits of homemade wax

It seems that homemade waxing needs more effort than it’s worth, but actually there are many benefits of making and using homemade wax. Some of these benefits are:

  • Low cost. Cost of salon waxing may reach up to $30 to $100 or more, depending on the body area. But for homemade waxing many of the ingredients and tools can be purchased, cleaned, and reused for considerable savings in the long run.
  • Superior ingredients. Not for all salons natural waxes are used. Some waxes brought from storesmay contain dyes and additives that can irritate skin. Making your own homemade wax can make sure that you only use safe and natural ingredients.
  • Comfort and privacy. Although body waxing is carried out by professionals still some people can feel awkward or shy to be waxed by a unfamiliar person. Performing wax at home reduces a possible awkward encounter.

Risks associated with homemade waxing

Although there are many benefits of waxing at home, it also carries some risks. The risks can increased if safe waxing techniques are not in your knowledge. Some of the risks include:

  • Risk of burning. If the hot wax is applied too soon before allowing it to cool, it may accidentally burn your skin. It depends on the severity of the burn; that you may be in need of first aid at home or may have to visit the emergency.

  • Skin instead of hair may get removed. If the skin to be waxed is too dry, the wax by accident may stick to the skin instead of only the hair. This can bring pain and inflammation as the skin heals.

  • Gaining infection from ingredients. Salons have to follow special hygiene practices in order to avoid the spread of infections. If the waxing station is less hygienic, you have an increased risk of infections caused from contaminated ingredients.

Conclusion

Homemade waxing is a great option instead of salon waxing. There are a variety of choices for making your own homemade wax, like soft wax, hard wax, sugar wax, and useful wax blends.

Various body areas like arms, legs and face can be waxed safely at home by using all natural body wax. Although there are some risks for at home waxing, there is also abundance of benefits if you are have proper knowledge about how to wax at home.

Glee hair removal technique is the replacement of shaving. The glee wax strips are used to remove hair from your body. They provide amazing results that are long-lasting. Which means you will not have to wax ever again, for a long time. which is pretty great if you ask me. Glee hair removal cream helps to gets rid of your body hair in just 3-5 minutes.

Glee hair removal cream:

Could it be simply me personally or perhaps is waxing exceptionally painful? I’ll be honest We attempted it and liked the outcome with you. I’m not really a fan of locks down there and waxing provides a smooth hairless completed unrivaled by the razor that is most beneficial for a good time. But therefore, does locks treatment cream.

How to use Glee hair Removal cream:

We forced apart my typical Nair cream and provided these items that is brand new try. joy + glee expanded their beauty line from razors and mousse that is shaving include wax strips and locks elimination cream. The things I enjoyed about glee’s hair removal cream could be the tip that is circular, which eliminates needing to place the cream on your own hands.

Which means that we don’t need certainly to scrub to have the scent out of under my fingernails. You’re permitted by the applicator to utilize the cream more straight and effectively. Talking about scents, hair that is glee cream nevertheless sticks, but features a softer fragrance. It features a honey melon fragrance that is energizing.

The container additionally includes completing cream which contains aloe vitamin and vera age.

Personally, began locks that is making use of cream in replace of my razor because I needed to see if laying from the razor would relieve some razor bumps. I’d become constant; however, it sooner or later did assist.

Interesting fact:

Therefore, what’s not to ever like? This could be considered a good, but just like me, you’ll need the more powerful material when you yourself have stubborn locks. And glee’s hair removal cream is moderate. We attempted it under my throat on two split occasions following the time that is first’s keep me baby bottom smooth like i love it. We left it for a longer that is little my second-go-round (around five full minutes) and ended up being pleased. I do not feel just like my epidermis had been dry out plus the finishing cream offered soothing dampness that is additional.

I understand exactly what you’re thinking, a depilatory simply appears like a chemistry task then one you don’t need to place your epidermis on. I didn’t try out this item when you have super epidermis that is sensitive and painful because duh. And about any of it, decide to try your skin test (instructions in the straight back for the package) if you’re uncertain.

You can buy glee hair removal cream kit at Walmart for ($8.97) only.

Cirepil Blue is the original product and can be used for all-purposes. Infect cirepil wax is ideal for use on all areas of the body even on sensitive skin. Especially it can be used in Brazilian and bikini waxing methods. Cirepil Wax can be used on all types of skins and hairs type. Cirepil wax has a supple gel texture. Which makes it supper easy to use. But on the same time it remains highly flexible. And there occurs no breaking or cracking of the wax, after drying, when applied correctly.

Is Cirepil wax good?

This is actually the most readily useful, and easiest to use wax we have ever really tried. It dries super quickly so when it dries vacuum pressure is made because of it seal round the locks. It doesn’t follow epidermis in any way and cuts the pain sensation down 75%. I would personally spend $150 bucks with this material since it is brilliant.

How To Use:

Application:

Waxing with Cirépil was is fast! A small amount of wax gives long-lasting and amazing results. Less time is needed, when you are using cirepil bead wax, to wax large areas of your body. It requires less time which in turn allows you to service more clients in lest time.

Removal:

Drying time of Cirépil non-strip and strip-waxes is very less, which is one of the outstanding feature of this waxing technique. Just simply apply and when gets dry remove it. Waxing is very faster when using cirepil wax.!

Completing the Service:

Say goodbye to retouching and through away your tweezers. With proper application of wax, there are no excess hairs left, and also no waxy residue and no stickiness left behind after waxing.

Features and Benefits:

  • Gel texture is Ultra-fluid

  • Vibrating blue color

  • Supper easy to apply in thin layers

  • High quality product

  • consistent removal: Awesome results

  • Ideal for using on sensitive areas

  • Ideal for all skin and hair types

  • Can be effectively use on short shaved hair

General Instructions:

  1. Melt the wax in a wax heater until it is the persistence that is appropriate.

  2. Check out the heat by testing the wax in the of one’s wrist.

  3. Clean the particular area become waxed with Cirepil Blue Lotion. Condition and protect your skin by having a fall or 2 (based on size regarding the specific area) of Cirepil Pre Wax Oil. Therapeutic massage well to the epidermis. Blot oil that is extra muscle.

  4. Make use of spatula that is disposable apply the wax having an also perimeter in direction of hair regrowth.

  5. Take away the strip into the way that is contrary of development.

  6. After waxing, refresh and soothe the epidermis with Cirepil After Wax Gel.

Ingredients:

Ethylene/copolymer/elastomer, Rosin, Beeswax, Glycerol Rosinate, Lanolin, Ethylene/VA copolymer, Triethanolamine, Technical hydroabietyl alcohol, FDC blue.

Cirepil wax heater:

There are lost of heater available on amazon for heating the beads wax just like the cirepil wax. Almost all of them works well. But make sure you buy the one from a real buyer. And never forget to check the reviews of the product before buying it.

Conclusion:

In cases where a wax becomes necessary by you that hardens quickly yet stays versatile for simple elimination, test this one. Exceptional for sensitive and painful areas, numerous waxing experts utilize Cirepil Blue for the underarms, bikini area, and waxing that is brazilian. This wax heats at a heat that is low contains jojoba oil for customer convenience. Apply with disposable applicators which are wood. Tidy up is straightforward with any wax cooking pot cleaner. Creamy gel texture.

Sugar Wax Recipe, Waxing is a popular method of hair removal, but it can quickly add up in cost when you factor in the procedure, tip, and aftercare.

:trident: Hair removal at home has never been easier thanks to homemade wax.

To save money, you might consider making your wax and using it to wax at home instead of going to a professional salon. With the help of this article, you’ll learn how to make your homemade wax for hair removal, as well as a few of the advantages of doing so.

:trident: Types of home-made waxes

A variety of waxes are available for the body waxing. Food and beauty supply stores, salons, and the internet are all places where waxing ingredients can be purchased.

:high_brightness: waxing strips and applicators may be necessary if you want to do it at home.

:sparkles: Wax that hardens

Bikini, underarm, lip, and eyebrows are all good candidates for hard wax because of their smaller size and more sensitivity than the larger parts of the body.

When it comes to sensitive areas of the body, hard wax is among the most popular options for waxing. To make hard wax, beeswax and rosin are used as the primary ingredients. Oils and vitamins, as well as other therapeutic compounds, are often added. Remover strips are not required for hard wax.

You can buy beeswax and rosin if you want to make your hard wax. There is normally four-to-one rosin to beeswax ratio. Oils like olive or coconut can also be used to enhance the flavor of the dish.

On the high setting of the warmer, hard wax can be melted for 15 to 20 minutes. Keep the heat low for future use after it has been melted.

:sparkles: Wax with a pliable consistency

:high_brightness: As a rule, it’s best for larger areas like the arms and legs.

For bigger parts of the body, such as the legs and arms, soft wax is a good alternative. Hard wax-like substances such as rosin, oils, and other additions are present. To remove soft wax, use wax strips or cloths.

:sparkles: SOFT WAX COOKBOOK RECIPES

:high_brightness: A common recipe for those who use soft wax is as follows:

  • Granulated sugar: 1 cup of white

  • 1 tsp. of lemon juice.

  • a quarter of a cup of honey

  • Add the sugar to a pot and bring it to a boil. Pour in lemon juice and honey one tablespoon at * a time as the sugar caramelizes. Ideally, wax should be the same consistency as the batter. * Add a tiny amount of water and stir if the wax is too thick.

  • It’s possible to use the warmer to melt both soft and hard wax.

:sparkles: How to use soft wax at home.

:high_brightness: Wax made of sugar

Using sugar wax on any part of the body or skin type is safe and effective. Because sugar waxing is regarded to be more natural and less painful than other types of waxing (soft and hard waxing), it has been a popular waxing alternative in recent years. Citric acids like lemon juice are commonly used to make sugar wax.

:sparkles: RECIPE FOR SUGAR WAX SUGAR

According to HTD.COM, you can make your sugar wax at home using this recipe:

Over medium-high heat, combine the ingredients in a pot and stir until they are completely dissolved. Once the mixture reaches a boil, stir it frequently to ensure that all of the ingredients are incorporated. It’s time to let the mixture caramelize until it resembles honey in color. Allow it to cool before transferring it to a container.

:trident: Using sugar wax in your own home

A wax made from chocolate, fruit, or honey These waxes can be used on any part of the body, but they’re especially good for sensitive skin and smaller areas.

They’re made from the same base as hard or soft wax, but they’re said to be better for the skin because they’re made from chocolate, fruit, and honey.

Chocolate and fruit both contain anti-inflammatory plant compounds that can help alleviate pain and inflammation. Antioxidants and anti-inflammatory minerals are also found in honey, making it an excellent source of both.

:sparkles: FRUIT AND HONEY WAX RECIPE FOR MADE FROM SCRATCH

  • The hard or soft wax recipe above can be used.
  • Cocoa powder: Add between 10 and 20 grams (g) to each serving.
  • Add 10 to 20 grams of pure fruit juice or powdered fruit mix to the fruit.
  • In the case of honey, use 10-20 grams of pure honey or extract.
  • Hard wax and soft wax can both be reheated and utilized in the same way, depending on the basis.

:beginner: SUMMARY

Is there a minimum amount of time required? It’s best to wait until your hair is at least 1/4-inch long before you wax. That way, you can be confident that you’ve pulled all the hair from the root. Try to grow out the hair from your most recent hair removal for at least two weeks before your first waxing session.

:trident: Waxing at home

:high_brightness: A few pre-waxing precautions must be taken before using your new at-home wax recipes.

Make sure the wax is fully adhered to the hair by thoroughly cleaning the skin.
Exfoliate gently to remove skin, open pores, and allow the wax mixture to go deeper into the hair shafts.

Before waxing, dab a little powder on the skin to soak up any extra moisture. Use of powder in the vaginal area should be avoided, as should inhalation of floating powders. Apply a very small amount of oil to the hairs to assist hard wax to adhere to them more effectively.

Always apply wax in the direction of hair growth and remove it in the opposite direction of hair growth At least half an inch length is ideal for optimal outcomes. It’s important to test wax before applying it to sensitive regions like your face to ensure that it isn’t overly hot.

The upper portion of the lip. When it comes to DIY waxes for the upper lip, the best options are either hard or sugar wax. Wax can be applied as far as the corners of the mouth while waxing between the nose and upper lip.

:sparkles: Eyebrows

It is advisable to use hard wax and sugar wax to remove eyebrow hair.

Make sure to follow the natural arch of the brow when waxing above the brow to avoid removing too much hair. When waxing below the brow, avoid getting too close to the eyelid or the eye itself.

:sparkles: Arms

Soft wax and sugar wax are two of the best DIY waxes for the arms.

With a larger area like the arm, you’ll need to cover more ground with soft wax. Waxing the arms in two to three parts ensures the most hair reduction.

:sparkles: Legs

Soft wax and sugar wax are two of the best homemade leg waxes.

Because leg hair can be removed, soft waxing is becoming more popular. Waxing the legs in sections ensures the greatest hair removal.

:sparkles: The area around the bikini line

Hard wax and sugar wax are two excellent bikini wax alternatives that may be created at home.

Women who have a trustworthy source groom their bikini area at least eighty percent of the time, according to studies. When it comes to sensitive skin in this part of the body, hard wax and sugar wax are great options.

It is important to keep the wax away from the vagina when waxing the bikini area Also avoid using chocolate, fruit, or honey wax in this area, as these ingredients can cause vaginal irritation.

:beginner: SUMMARY

To prepare for waxing, use a baby powder after cleaning your skin. As a result, the wax and cloth strip will stick properly.

:trident: Waxing aftercare that you may make at home.

Wax residue on the skin can be removed with a dab of coconut oil. Using Vitamin E oil after waxing can also reduce post-wax inflammation. The best results can be achieved if the skin is kept free of harsh chemicals and perfumes.

The advantages of DIY waxing Creating and using your wax may seem like a lot of work, but there are many advantages to doing so. Among the many advantages are:

Reduced cost. When it comes to salon waxing, prices can range from $30 to $100 or more. It’s possible to save a lot of money by making your wax at home and then reusing the supplies you already have.

Improved ingredients. Some salons don’t use natural wax or waxes that contain dye or other chemicals that can irritate the skin. Creating your wax ensures that only safe, natural chemicals are used in its production.

Privacy. If you don’t feel comfortable being waxed by a stranger, you may want to look into professional waxing. Having a bikini wax done at home avoids the awkwardness of having to meet someone face-to-face.

:sparkles: Risks of DIY waxing.

Even if there are advantages to waxing yourself at home, you should be aware that there are also disadvantages. If you aren’t familiar with proper waxing practices, the risks of waxing at home are enhanced. Included among these are:

Self-inflicted fire. If you use the hot wax before it has had a chance to cool down, you could inadvertently burn yourself. It all depends on the severity of the burn and whether or not you require immediate medical attention.

Removing skin rather than hair. Waxed skin can adhere to the skin if it’s too dry, so make sure it’s moist before you begin. There may be discomfort and swelling as the skin recovers.

The risk of food poisoning from contaminated ingredients. To prevent the spread of illnesses, salons must adhere to professional sanitation procedures. If your homemade waxing station is unkempt, you may be in danger of contracting an infection from tainted substances.

:sparkles: At the end of the day

DIY waxing is an excellent substitute for salon waxing. Your possibilities for manufacturing your wax range from soft to hard to sugar to healthy wax mixtures.

Using all-natural body wax, you can safely wax your legs, upper lip, bikini, and other parts of your body at home. At-home waxing has some risks, but if you’re well-versed in waxing at home, there are many advantages.

:beginner: SUMMARY

To acquire the best results from sugaring, the paste must be properly warmed. A soft and pliable paste is needed to grasp all the hairs. However, if it is overheated, it will turn into a liquid and stick to your hands.

:diamond_shape_with_a_dot_inside: FAQS

:high_brightness: people also ask

:one: What is the sugar wax percentage?

A 2:1 sugar to liquid ratio is ideal in most cases. If you’re using 1 cup of sugar, you’ll need to combine it with 1/8 cup of lemon juice and 1/4 cup of water to make this recipe. Give it a thorough stir before adding the rest of the ingredients to a pot.

:two: Is it possible to manufacture sugar wax?

Three basic ingredients are all that are needed to create a sugar wax that you can use for at-home waxing. Sugar, water, and lemon juice are all you need. Unlike regular hot wax, which removes the hair follicle, sugar wax does not remove the hair, making it less unpleasant.

:three: Do you think sugar waxing at home is bad?

Your skin will certainly burn if you’re not familiar with this method, so it’s best to practice first. These reactions might lead to redness or even infection.

:four: My sugar wax isn’t hardening. What’s going on?

Your sugar wax is overcooked if it constantly comes out too hard. You may need to add extra lemon juice depending on how hard the sugar mixture is. Continue to boil for another 1–2 minutes after adding more lemon juice. You may need to add more lemon juice if it’s not flexible enough after boiling.

:five: To manufacture sugar wax, what temperature do you use?

Add the ingredients to a heavy saucepan and bring the heat to medium-high. Then turn the heat down to low and continue cooking until the mixture reaches 250°F (stir frequently so it doesn’t boil over). Heat to 245°F if you prefer a thicker paste.

:six: To begin waxing at home, how can I get started?

Make sure your skin and hair are ready to be before beginning. Apply an exfoliant. Gentle exfoliation a day or two before waxing will eliminate the skin cells that surround the hair follicles… Skin that has been well cleaned. You should always begin your waxing session with clean, dry skin. Cut your hair first if you must.

:seven: Is waxing responsible for the formation of ingrown hairs?

Waxing eliminates hair from the root, allowing the hair to grow back with a naturally beveled edge. When done incorrectly, waxing can cause ingrown hairs. Ingrown hairs can occur if waxing is done incorrectly. When done correctly, skin waxing removes hair from the root.

:eight: Is it possible to create sugar wax without the use of lemons?

Sugar wax can be made without lemon, but if you can, it’s best to use it. There are several benefits to using fresh lemon juice, including its ability to combat the bacteria that can lead to breakouts and its ability to hydrate the skin.

:nine: Hair regrowth may be reduced by waxing.

As long as it is done every four to five weeks, waxing inhibits the growth of hair. Hair grows back finer, lighter, and softer after waxing than after shaving because it is pulled out from the root rather than being cut off at the surface.

:keycap_ten: What’s causing the foaming in my sugar wax?

Determine when the combination is ready by watching it closely. If you notice a lot of foaming, you can lower the temperature… Put your hands in water before kneading the wax so that it doesn’t adhere to your hands as you remove the mixture from the saucepan.

:diamond_shape_with_a_dot_inside: Conclusion

Wax that doesn’t work is mainly due to a lack of pressure. The hairs won’t stick to the wax strip if you don’t apply enough pressure. Using the correct amount of pressure while applying wax to the skin frequently solves the problem of wax not pulling out hair.

Related Articles

1 - Sugar Wax Recipe
2 - Sugar wax recipe without lemon
3 - Sugaring recipe