Japanese Hair Straightening, which may be additionally called Thermal Reconditioning is a great straightening treatment for those that want to spend less time styling their hair. The hair gets straightened employing a combination of warmth and chemicals.

How Does Japanese Hair Straightening Work?
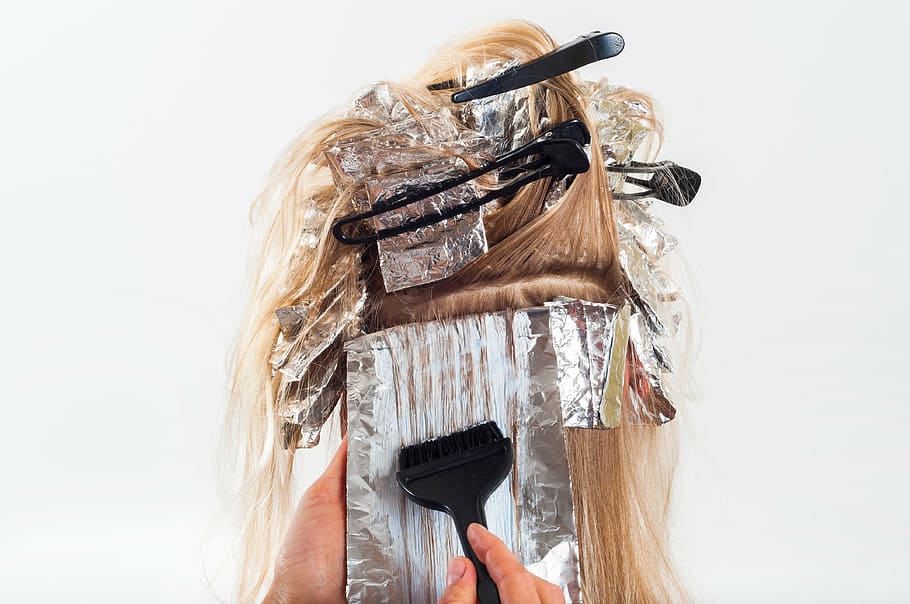
![]() Japanese Hair Straightening works with a thermal reconditioning system. This suggests your stylist will apply a special solution to your hair that breaks down your hair’s bonds and its structure.
Japanese Hair Straightening works with a thermal reconditioning system. This suggests your stylist will apply a special solution to your hair that breaks down your hair’s bonds and its structure.
![]() Once applied, the answer will do its magic and your stylist will rinse it out. Your hair is then ■■■■-dried and flat ironed leaving a remarkably pin-straight look that’s treated with a neutralizer. The neutralizer is effective to keep your hair’s new shape.
Once applied, the answer will do its magic and your stylist will rinse it out. Your hair is then ■■■■-dried and flat ironed leaving a remarkably pin-straight look that’s treated with a neutralizer. The neutralizer is effective to keep your hair’s new shape.
Japanese Hair Straightening Involves:
-
Your hairstylist will check if your hair is fit to travel through the treatment. This stage is consultation.
-
Shampoo is going to be wont to wash the hair. You’ll also add a protein-based conditioner to offer the hair strength for the Japanese straightening treatment ahead.
-
The answer is going to be added to your hair to cause a breakdown of the hair protein structure. There’ll even be a strand test to work out if your hair is robust enough to still subsequent phase.
-
If the strand test comes back with a positive result, your hair is going to be rinsed, and the conditioner is going to be added alongside a heat protectant. This is often where the ironing is going to be done at a particular temperature.
-
Then, there’ll be the addition of more heat protectant and thermal conditioners.
-
You’ll need to sit under the hand blower for about 40 minutes, or a hand blower is going to be used on your hair.
Japanese Hair Straightening Aftercare
![]() After spending several hours and far money on getting that Japanese straight hair you’ve got been craving, it’s important to understand the way to look after it. You ought to know what to try to do and what to not do.
After spending several hours and far money on getting that Japanese straight hair you’ve got been craving, it’s important to understand the way to look after it. You ought to know what to try to do and what to not do.
![]() Avoid any sort of moisture 72 hours after the treatment, from touching your hair to washing it, be it water from rain, the pool, the shower, or maybe from perspiration. This may make sure the neutralizer has enough oxygen to finish its work on the hair.
Avoid any sort of moisture 72 hours after the treatment, from touching your hair to washing it, be it water from rain, the pool, the shower, or maybe from perspiration. This may make sure the neutralizer has enough oxygen to finish its work on the hair.
![]() Confirm you don’t apply any hair styling accessory that keeps the pressure on the hair 72 hours after straightening it. Items like rubber bands, clips, or holders, even tucking your hair behind your ears will create a permanent bond within the hair.
Confirm you don’t apply any hair styling accessory that keeps the pressure on the hair 72 hours after straightening it. Items like rubber bands, clips, or holders, even tucking your hair behind your ears will create a permanent bond within the hair.
![]() Get a special moisturizing shampoo that’s created for soft hair and doesn’t contain harsh chemicals. You ought to also keep a hand blower away for several days.
Get a special moisturizing shampoo that’s created for soft hair and doesn’t contain harsh chemicals. You ought to also keep a hand blower away for several days.
![]() Hair coloring or similar chemical treatments should be avoided for about two to three months after Japanese hair permanent straightening. Don’t ignore this instruction because ignoring this instruction can cause significant hair damage.
Hair coloring or similar chemical treatments should be avoided for about two to three months after Japanese hair permanent straightening. Don’t ignore this instruction because ignoring this instruction can cause significant hair damage.

![]() Attend the salon for touch-ups after 4-6 months, which can make sure that your hair remains straight, and your curl will still retain its strength.
Attend the salon for touch-ups after 4-6 months, which can make sure that your hair remains straight, and your curl will still retain its strength.
![]() Use styling products that contain SPF to guard your hair against UV damage. you’ll also wear a hat to guard yourself against the sun.
Use styling products that contain SPF to guard your hair against UV damage. you’ll also wear a hat to guard yourself against the sun.
![]() For a minimum of a fortnight after the method, stand back from chlorinated water or any environment that has strong chemicals.
For a minimum of a fortnight after the method, stand back from chlorinated water or any environment that has strong chemicals.
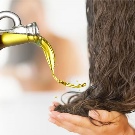
![]() Apply protein-infused rich conditioning treatments to your hair once every week to stay its shiny, healthy look.
Apply protein-infused rich conditioning treatments to your hair once every week to stay its shiny, healthy look.
How Long Does A Japanese Hair Straightening Last?
![]() About 6 months
About 6 months
The Japanese Hair Straightening may be a permanent treatment. Once done, you’ll enjoy the results for up to 6 months.

Japanese Hair Straightening Pros and Cons
Pros of permanent hair straightening
- Permanent straightening at the salon is that the cheapest of the salon options for getting results, and therefore the least time-consuming.
- It lasts for up to six months, and as untreated hair grows in, the load of the treated hair beneath it can mean it grows in looking like soft waves.
Cons of permanent hair straightening
- Perms work by damaging your hair follicles so that they can’t hold their shape.
- Split ends, breakage, and hair loss can occur. You’re also exposing your body to harmful chemicals during the perm process.
- After getting a perm, you can’t color-treat or otherwise modify your hair, and you won’t be ready to wear it curly, albeit you would like to.
Japanese Hair Straightening Cost
![]() The cost of the permanent hair straightening technique will differ from one hair salon to a different. It’s therefore important that you simply visit the permanent hair straightening salon and determine what proportion it’ll cost you.
The cost of the permanent hair straightening technique will differ from one hair salon to a different. It’s therefore important that you simply visit the permanent hair straightening salon and determine what proportion it’ll cost you.
![]() Don’t only consider the value of the appliance but also the products you’ll get to a lookout of your hair and therefore the retouch cost. Confirm you’ll afford the value without going over your budget or limiting the care products.
Don’t only consider the value of the appliance but also the products you’ll get to a lookout of your hair and therefore the retouch cost. Confirm you’ll afford the value without going over your budget or limiting the care products.
![]() SEE ALSO:
SEE ALSO:
How to make hair grow faster
How to get thicker hair
Advantages of Japanese hair straightening Technique
- Makes it easy to manage curly unruly hair. If you’ve got coarse and curly hair, then the technique will make your hair easy to manage. you’ll make certain of fantastic result with the Japanese hair straightening technique
- Gives you peace of mind after the straightening. the method lasts up to 6 months which means you’ll make certain of fabulous hair for an extended period. After 6 months you’ll only get to retouch the hair and you’ll continue enjoying good-looking hair.
Summary
Your hair will become shiny, glossy, and sleek. The procedure will make your hair look good for a long. If you’ve got a busy lifestyle then Japanese hair straightening is going to be perfect for you. You don’t require additional heat styling after the procedure to form your hair look good
Disadvantages of Japanese hair straightening Technique
-
The cost of the procedure is high.
-
The hair process alters the hair bonds changing the hair structure completely. It’ll not be possible to vary the hair after the method. It becomes impossible to regain the quantity and body of your hair after the method. You would like to gauge your hair needs before you agree to this system.
-
It’s going to end in hair damage if it’s done by an inexperienced hairstylist. It’s therefore important that you simply visit the hair straightening salon and let the expert work on your hair.
The cost of the chemical treatment, the aftercare, and the retouch is high. If you don’t have the cash to shop for the aftercare products which will cause hair damage. It’s therefore important that you simply allow the procedure before diving in.
Japanese Hair Straightening v/s Keratin
-
Japanese hair straightening is additionally referred to as Thermal Reconditioning, Rebonding, or Yuko while a keratin Treatment is additionally referred to as a Brazilian Blowout, Brazilian Keratin treatment, or Keratin complex treatment.
-
Japanese hair straightening changes the interior bond of human hair while Brazilian hair straightening doesn’t, it only smoothens out the cuticle and repairs hair damage.
-
Japanese hair straightening produces permanent results while Brazilian hair straightening lasts for 2 to four months counting on the hair type.
-
Keratin Treatments are safe for all types of chemically treated hair this suggests that this hair treatment might be safely used for hair that has been previously permed, straightened, relaxed, bleached, colored, or highlighted.
Japanese Hair Straightening On Color Treated Hair:
![]() Japanese Hair Straightening also can be performed on many sorts of hair including color-treated, bleached, highlighted hair, but a consultation is usually recommended to form sure the hair is suitable to figure with.
Japanese Hair Straightening also can be performed on many sorts of hair including color-treated, bleached, highlighted hair, but a consultation is usually recommended to form sure the hair is suitable to figure with.
![]() Colored hair may be a bit ■■■■■■ and requires special attention to detail. The specialists at Patrick Evan Salon have extensive training in working with color-treated hair. we would like to form sure every client loves their hair and can shy away from a client if we don’t feel we will produce excellent results.
Colored hair may be a bit ■■■■■■ and requires special attention to detail. The specialists at Patrick Evan Salon have extensive training in working with color-treated hair. we would like to form sure every client loves their hair and can shy away from a client if we don’t feel we will produce excellent results.
Japanese Hair Straightening At Home Step By Step Guide
Japanese Hair Straightening Treatment At Home- Step By Step Guide
Step 1: Pre Treatment
Before performing a Japanese hair straightening treatment reception, you would like your hair to be in its best condition. Confirm you haven’t done the other chemical treatments sort of a perm or coloring recently.
It’s also an excellent idea to use a conditioning hair mask within the weeks leading up to your treatment. this may help keep hair looking smoother and straighter following the treatment.
Gather up everything you’re getting to got to perform a DIY Japanese hair straightening treatment before you start.
You’ll need:
1. Japanese Hair Straightening Treatment KitThe LISCIO Crystal Cream Straightener kit by Milbon is that the best Japanese straightening cream you’ll get your hands on. The formula comes in 3 different strength levels such as Mild, Normal and Powerful
2. Clarifying ShampooAny type of Shampoo’s will work, but this one from Kenra is awesome.
3. Ionic hand blowerIt’s best to use an ionic hand blower to stay frizz cornered.
4. Ceramic Coated StraightenerA ceramic coated straightener helps keep hair straight even after the treatment.
5. Thin Plastic CombThese thin combs work best for separating hair during and after the japanese hair straightening treatment.
6. Deep Conditioner:Use your favorite deep conditioner after the treatment to stay hair healthy.
7. The assistance Of a FriendIf you’ve got tons of hair to figure with, an additional hand will assist you to get finished more quickly, and obtain more even results.
Shampoo hair with any high conditioning shampoo, and rinse thoroughly. Clean hair helps the straightening solution stick with the strands. If you’ve got sensitive skin, it’s great to line your hairline with a touch vaseline, and avoid getting the straightening cream directly on the scalp.
And finally, this is often the step is where the magic starts! You’ll want to start with a sample patch to ascertain how long the answer must sit on the hair to process. the time interval can take where between 10 minutes and 1 hr counting on your hair thickness. Perform a loop test to ascertain when it’s ready. to find out the way to do a loop test, you’ll inspect this video:
Be super thorough and obtain all the answers out of your hair during this step. After you’ve cleaned it all through water, gently dry the hair with a towel. make certain to not scrub or pull on hair because it’ll be susceptible to breakage.
■■■■ it mostly dry, but leave just a touch of moisture in your hair. The key’s to urge it almost, but not completely dry, and prepared for the flat iron.
Set your straightener to 350 degrees, and add small sections to straighten all of your hair. catch on as smooth as possible, but work quickly because it is often a time-consuming step.
Step 7.1: Apply the NeutralizerThe neutralizer works to balance the pH of your hair. Apply evenly everywhere hair, and let sit for 5-10 minutes before rinsing out.
Make sure you rinse for a minimum of 10 minutes and obtain any remaining solution out of your hair.
■■■■ drying your hair within the direction of the cuticles,till about 90-95 percent dry hair . Your hair should be pretty silky straight already but provides it one final ■■■■-dry to urge it as silky straight as possible.
Do your best to stay hair dry for the subsequent 48 hrs if possible. It’s even better if you’ll wait for 72 hours. This really helps lock within the style and helps your treatment to last as long as possible.
And that’s it, enjoy your new straight hair! Your style should last about 6 months before another treatment is required. Use the 2-in-1 Treatment and Protection Cream from Milbon to simply get a good result on your second DIY Japanese hair straightening treatment.
And there you’ve got it- all you would like to understand about doing Japanese hair straightening reception. We hope you enjoyed, and happy straightening!
Frequently Asked Questions
People are also wondering about following queries:
1-Is Japanese hair straightening better than keratin?
Unlike Japanese hair straightening which ends up to stick-straight locks, a Keratin Treatment primarily prevents frizz while only reducing the wave or curl but makes it super easy and quick to urge the hair to become stick-straight with minimum effort. People are also trying hand-tied extension to give extra natural look to their hair.
2- Can Japanese hair straightening cause baldness?
Because of the intensity of the treatment, it’s extremely important to try to to your research on the stylist. If done incorrectly, Japanese hair straightening can wreak havoc on your hair, causing major damage and even hair loss
3- How am i able to permanently straighten my hair naturally?
Like other beauty treatments such as chin fillers, jaw fillers, stretch mark tattoos and lip flip people are also worry about how to Straighten their hair, naturally or by any other method. But you can try certain things to straighten your hair:
- Multani Mitti. the advantages of soil , also referred to as multanu mitti, are alright known, but only a few are conscious of the very fact that it isn’t just great for your skin but even your hair. …
- Milk and Eggs.
- Coconut Milk and juice .
- Aloe-Vera Gel.
- Banana and Honey Pack.
Conclusion
![]() With Japanese hair straightening, human hair is permanently silky straightened with a special solution. The hair is then rinsed through water, then separated into sections with thin comb and then dried and ironed. The hair is then neutralized with another chemical solution and rinsed through water and dried again. Counting on the hair length and thickness, Japanese hair straightening can take up to five hours to finish .
With Japanese hair straightening, human hair is permanently silky straightened with a special solution. The hair is then rinsed through water, then separated into sections with thin comb and then dried and ironed. The hair is then neutralized with another chemical solution and rinsed through water and dried again. Counting on the hair length and thickness, Japanese hair straightening can take up to five hours to finish .
![]() Once straightened, hair won’t return to its frizzy or curly form, although any new hair growth will maintain the natural texture of your hair.
Once straightened, hair won’t return to its frizzy or curly form, although any new hair growth will maintain the natural texture of your hair.
![]() Though Japanese hair straightening didn’t get an equivalent bad safety reputation because the Brazilian blowout, it’s still known to cause damage. Note before appointment if your hair has been color treated or received other chemical treatments, you’re at a high risk of damaging your hair with thermal reconditioning.
Though Japanese hair straightening didn’t get an equivalent bad safety reputation because the Brazilian blowout, it’s still known to cause damage. Note before appointment if your hair has been color treated or received other chemical treatments, you’re at a high risk of damaging your hair with thermal reconditioning.
References
Japanese Hair Straightening At Home (DIY Step-by-Step Guide)
https://www.patrickevansalon.com/keratin-vs-japanese-hair-straightening
Japanese Hair Straightening Guide: Pros, Cons & Aftercare Tips - Glowsly