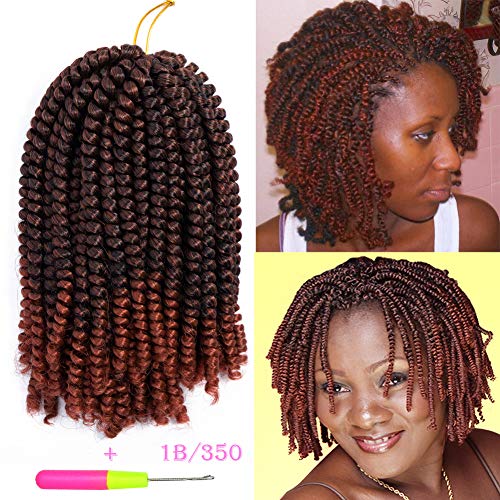
Spring twists are hair extensions used to create a twisty and springy hairstyle. It’s distinctive from other twists because of the hair quality used for installation. It is a wavy pattern that is thick and has to be divided to make the style.
Twists are a constant ideal because they give lots of versatility, most styles are quite light to wear in a bun without making it heavy.
The hairs are very light in weight that after completing the style, they actually bounce up like a spring and give a gentle look( from which this style gets the name). You’ll give up to eight hours placing the twists, same as most protecting styles, but the prize of a new low-maintenance appears to be worth it.

How Much Hairs to Use
Spring twists can be of any length depends on your preference. You can carry a longer length without worrying about weighing it down because of its lightweight. Spring hair mostly available as three bundles of hair in a pack, but mostly one and a half bundle is enough for many people to complete their whole head. To obtain medium-sized twists, split each coil into two, three, or four if you need a smaller twist.
How to Install Spring Twist
Installing spring twists and other protective styles have some similarities. Patience is the first thing you need (whether you are taking the help of a stylist or doing it yourself).
Step 1: Gather your tools
To install spring twist, you’ll require to assemble some tools that you already have and you may need to buy new ones.
-
Pack of spring twist braiding hair
-
Wide tail comb
-
Leave-in conditioner
-
Rat tail comb
-
Hair cream(which suits you)
Step 2: Wash your hairs, moisturize them, and then ■■■■-dry. Always use a heat protectant before ■■■■-drying your hair.
Step 3: Detangling the twists
Spring twist hair is bundled in a way, that all the strands set together to create a pretty pattern. You have to separate the hair by yourself before you can start to twist it. Some of the packages come separated while others are not. Purchasing pre-separated hair is expensive but it will save time than detangling it by yourself.
Step 4: Divide your hair into parts
Dividing your hair into 4 big sections is the most efficient way, like your mom or granny used to do it. Making a ponytail or part rows into the hair is also applied by some people. You should do what is suitable for you. If you are parting your hair into 4 big sections, whichever section you begin with you deem section 1. As the bigger the part is, the more hair will be used, the bigger the twist. It’s fine if you need big twists, but start small and look for the perfect size for you.
Step 5: How to Twist it
You will need 2-4 strands of already separated twists; the size will be depending on your preference. Grab a generous amount of moisturizing cream; apply it to the roots, preferably a small section. Install two strands of spring twist hair and bring it as close to your scalp as possible. Start braiding your hair for about one inch, then shift to a two-strand twist. The braid is just to secure the hair to stay in place. Continue the process all over the head.
Points To Ponder
Make sure to detangle the hair as you twist it will prevent having a knotted mess by end of the twist. Tight twists will take away the natural springiness of the hair. also do not pull too much hair out of your scalp. The whole process will take up to 8 hours depending on the level of your skill.

Read More
Mustard oil for hair
Oribe Shampoo
DIY Deep Conditioner
Maintenance
The great thing about this hairstyle is, it’s very easy to maintain. You only need a gentle cleanser to build up a bay and oil to moisturize your scalp, a silk bonnet will help you to maintain your hairstyle. This protective hairstyle lasts for 4-6 weeks.
How to Wash Spring Twist
Spring twists are most easy to carry and maintain protective hairstyle because it’s a really very light-weight hairstyle and super easy to clean and take care of.
Thing We Need
-
Shampoo (most preferably sulfate-free)
-
Conditioner (scalp care)
-
Hair mask (shea and coconut preferred)
-
Some clips
-
Scalp massager (optional)
How to do it
-
First of all tie your hair leaving the back part of your hair.
-
Damp your hair and apply shampoo onto your scalp and gently massage via massaging brush or your fingers you can also clean the shaft of your hair if needed. Repeat the process throughout your hair step by step and wash it off.
-
Once you are done with shampoo, mix your conditioner and hair mask and apply it to the roots and scalp again by dividing your hair into sections. Rinse it off gently after 2-3 minutes.
-
Now squeeze all the water out from your spring twist extensions as they soak the water a lot, you can squeeze a couple of times the more you squeeze the more water will come out. Pat dry with a towel.
-
To moisturize your hair spray the mixture of olive oil and castor oil all over your hair.
-
Now apply the mixture of grapeseed oil, extra virgin olive oil, castor oil, and avocado oil onto all over your scalp and gently massage.
-
Now apply hair butter all over your natural hair and extensions.
You can repeat this process after every 3-4 days depends on your need.
A massage brush helps in lifting the dirt from your scalp without disturbing your braids, so it’s perfect for your box braids, cornrows, and everything like that.

Cost of Spring Twists
The cost of spring twist varies from the style of hair, quality of the product, and the professional salon or expert you take the services from. An average rate for different styles are listed below:
|Style|Price|
|—|—|—|
|SPRING TWISTS(BYOH)|$190-$250
|SPRING TWISTS (BYOH) 18-22INCHES|$280
|THUMB SIZE BOX BRAID 22inches|$280
|TREE BRAIDS (bring your hair)|$180-220
|BOX BRAIDS PINKIE FINGER SIZE|$190-250
|BOX BRAIDS TOUCH UP|$95-105
|BOX BRAID WAIST LENGTH 22 INCHES|$250
|BRAZILLIAN KNOTS|$200 for two bundles
|CORN ROW|$35-$120 (depends on style)
|CORNROW & SINGLE (Twist/Braids) Sade Adu/ Tribal /Fulani Braid|$195-$255
|CORN ROW UPDO|$120-$250
|CORN ROW CROCHET|$190-$250
|BOHEMIAN LOCS/FAUX LOC/GODDESS LOCS|$250-$600
|HAVANA TWIST (expression hair)|$250+
|HAVANA TWIST (Marley’s hair)|$260+
|HAVANA TWIST TOUCH UP|$96+
|KIDS BOX BRAID|$140-$220
|KIDS CORN CROW|$45-$80
|KIDS ■■■■■ TWIST|$120-$170
|KIDS SENEGALESE TWIST|$140-$260
|■■■■■ TWIST|$160-$220
|■■■■■ TWIST TOUCHUP|$80-$120
|MICROS|$180-$225
|LOC METHOD MAINTANANCE|$60-$110
|NUBIAN TWIST|$185-$225
|SENEGALESE TWIST REGULAR LENGTH|$195-$225
|SENEGALESE TWIST TOUCH UP|$100-$125
|SENEGALESE TWIST WAIST LENGTH|$260+
|SEW IN WITH CLOSURE|$185+
|TWO STRAND TWIST|$70-$90
|VERSATILE SEW IN|$150+
|VIXEN SEW IN|$150+
|TAKE DOWN SEWINS/CROCHET/BRAIDS/CORNROWS/TWISTS|$25-$100
|POP SMOKE CORN ROWS|$125+
|KNOTLESS BOX BRAID/BOHEMIAN BOX BRAID/GYPSY|$220-$360
Related Articles
Crown Braid - How to do a Crown Braid
Fishtail Braid - How To Do A Fishtail Braid
French Braid - How to French Braid
Frequently Asked Questions
Some of the frequently asked questions are answered below:
1. Are passion twist and spring twist the same?
Passion twists are not the same as spring twists. Then what’s the difference between the two? Spring twists are created with pre-twisted hair, on the other hand, passion twists are created with not twisted but pre-curled hair.
2. Can you reuse spring twist hair?
Yes, some of the styles are reuseable like crochet braids, braids twists, and locs. On the other hand, Loose hair can be a little tricky. especially If it’s coarse and tangled.
3. How many twists twist out?
Do 6 to 12 twists because if the twists are too short, the hair will look almost straight. If you have heavy, rough twists smaller for more specified results.
Conclusion
Spring twist is a type of protective hairstyle which is very easy to carry because of its lightweight hair extensions, and also easy to maintain as its maintenance is not very costly. It’s easily available in a pack of three bundles and not very hard to install. Usually one and a half bundle of hair is enough for the installation all over your hair.