Hydro Dipping Shoes

Hydro-dipping (otherwise called submersion printing, water move printing, and hydro-imaging) is an exceptional cycle that permits you to apply illustrations to practically any three-dimensional item. This process has been used in the auto industry for years along with many other areas.
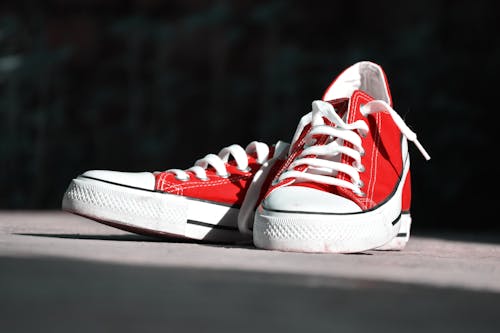
Hydro Dip shoes

You need to follow simple steps to easily dive shoes:

Step 1: clean your shoes !!

So you are wondering how to clean your shoes. Then you’ve come to the right place. To appropriately wash your shoes, you will require the materials: shoes, hydrogen peroxide, preparing pop, bowl, hard toothbrush, water and gloves on the off chance that you need. First you need to mix the hydrogen peroxide with the baking soda until it is liquid and gradually add water until it is all dissolved. Then dip the toothbrush and start scrubbing the shoes.

Step 2: hydrodipping !!!!

To properly hydro-dive your shoes, you must first glue the shoes to the parts that you do not want to hydro-dive. Things needed are:

  1. shoes

  2. spray paint (colors of your choice)

  3. bucket

  4. water

So you have to fill the bucket with about 80% water. Then, gradually spritz on the spray paint depending on how many colors you have. After you’ve completely soaked the shoe in the paint, take it out and put it in a dry place. Let it stand for 24 hours and then remove the tape. Hurray! You are done with hydrodipping.

Option 1: The first cost effective method requires mixing different spray paints in a bucket of water.

Start with the hardest and most boring part - sticking the shoes on to the sections where you don’t want to hydro dive. We suggest you use paint tape, as it is the easiest to cut and remove afterwards. Once you’re done recording, the easiest and coolest part - hydraulic soaking!

So fill a clean, empty bucket with about 70-80% water. Then apply spray paint little by little depending on the number of colors you have chosen (two colors are best). Then, after having completely pushed the shoes into the bucket for a minute, take them out and store them in a dry place. Leave the pair on for about 24 hours, remove the tape and voila - you’re done.

Materials needed:

  • Pair of shoes (old or new)
  • Bucket
  • Spray paint (s) - $ 3-8 / each box
  • Paintable tape - $ 5
  • The water

Option 2: The second hydraulic dipping technique also requires gluing the two shoes on the parts where you want to avoid hydraulic dipping.

In the second step, get some acetone remover and start rubbing the parts of the shoe that are not covered with duct tape. This way you will have the material a smidgen more prepared for painting. We recommend that you place the shoes in a box to keep the walls clean.

Once you’ve done that, take your chosen primer sprays and start spraying the shoes.

Safety Reminder: Put on a face mask to protect your lungs as several toxic fumes come from spray paints.

The necessary materials

  • (Old) pair of shoes
  • A paper box that you don’t use
  • Acetone remover - $ 3
  • Primer spray (s) of your choice - $ 5 / per box
  • Paintable tape - $ 5

Ultimately, here are some of the most common mistakes you should avoid at all costs when using custom shoes.

Hydro Dip Kit for shoes

Hydro Dip kit includes:

  • Hydrographic activator

  • Hydrographic top layer

  • Hydrographic base layer

  • Hydrographic primer

  • Pattern of your choice

  • Respirator mask

  • Protective gloves and sleeves

  • Wear pad

  • Instructions

Frequently Asked Questions (FAQs)

Q. How shoes can be hydro-dipped with spray paint?

A. Hydro Dipping is where the paint lying on the surface of the water is then transferred to an object by dipping. It produces psychedelic effects, is incredibly simple, and no two dips are ever the same!

To do hydro-immersion at home, all you need is acrylic spray paint and a large water bath.

Step 01: Prepare your wood

As with any paint job, before hydro-dipping, you need to prepare your job. Using 80 grit sandpaper, I blew through the clear protective layer and descended to the rough wood below. I then smoothed everything out with 180 grit sandpaper so that everything was smooth.

Step 02: Water bath

Any large, deep container will work for soaking. Since we use paint your container will also be partially painted during the process, it is best to use an older container so you don’t risk ruining something beautiful.

Large plastic containers can be picked up inexpensively at any big box home improvement store. You can even utilize it as a capacity holder after the paint dries if its all the same to you a sprinkle of shading in your stockpiling compartment.

Fill the container with enough water to completely submerge the item you wish to soak. For skateboarding, I even dove full to the brim, the container was not big enough.

Step 03: Add a handle to the immersed element

In the event that you need paint inclusion over the whole thing you are plunging, you should add a handle to your part so the paint can arrive at all surfaces (minus the handle). A handle is better than your hand getting in the way, and depending on where your handle is mounted, you can make the point of contact between the handle and the workpiece very small.

For this skateboard, I was able to attach the handle to the back of the board where the tape was - so there was no interference of the handle with the surface to be painted.

Q. Why shoes are to be hydro dipped?

A. Water immersion is a fun way to decorate any 3-D item that can be submerged in water without damaging it. While there are many companies that specialize in water immersion art for large items (for example, cars and sports equipment), it is possible to go through the process on your own and get creative. Buy a home hydro plunge unit online to apply your preferred plan, with insignificant gear or experience.You can also use spray paint to dip objects of your choice into your own unique designs!

01. Buy a kit

Look online for home hydro immersion kits, which allow you to transfer a specific print or design to a 3-D object (which can be immersed in water without damaging it) without specialized equipment . Generally, the companies that make these kits will offer a variety of designs to choose from to customize your kit. Basic hydro immersion kits for the home should include:
  • Printed film
  • Activator
  • Top layer
  • Base coat
  • Universal primer

02. Choose a suitable container.

Most DIY units don't accompany a holder to use during the plunging cycle. Choose an airtight plastic, glass, or aluminum container that is deep enough to completely submerge the object you are immersing in water. It should likewise be long and wide enough to leave 5-6 inches (around 12-15 cm) between the edge of the compartment and the item.

03. Prepare the article.

Make sure the item you are dipping is free of dust and debris. Spray the item with the primer provided in your kit, just enough to cover it but not enough to make the primer run off. Apply 1-2 light coats of the basecoat spray provided in your kit and allow the garment to dry for an hour or two.
  • Before applying the primer and base coat, use masking tape to block out any parts of the item that you don’t want an image printed on.

04. Size and cut the film.

Measure the size of the item you want to cover and add 4-5 inches (approximately 12-15 cm) on each side. Cut the film accordingly. Make sure the film stays dry during this process, as wetting it could cause the image to distort. Spot concealing tape around the edges of the film to shield it from rolling.

05. Position the container.

Fill the container with hot (but not boiling) water, to approximately ¾ of the filling level. Carefully take the film and bring the opposite sides together, holding it like a scarf. Place the bottom of the sling in the middle of the water surface and slowly lower the sides to place the film flat on the water.

Allow the film to hydrate and apply the activator.

Use your phone or a stopwatch to make sure the film dissolves for sixty seconds. After the sixty seconds, splash the activator provided in your pack equitably onto the film. When covered, it should take roughly 5-10 seconds for the film to go to fluid ink on the outside of the water.
  • At the point when the film is completely actuated it will have a particularly shiny appearance and will grow to fill the whole surface size of the compartment.

07. Submerge your article.

Hold the item at a 45 degree angle and slowly submerge it in the water. Once the item is fully submerged, level the angle by pushing it into the ink. Save your developments liquid for the best outcomes.

08. Rinse the item.

Slowly remove the item from the water. Hold the item gently and carefully and avoid rubbing its surface. Rinse with cold water immediately for approximately 3 minutes to remove any PVA residue.

Q. Which paint is used to hydro dip shoes?

A. Hydro Dipping is when paint laying on the outside of water is moved to an article by plunging. It does produce some psychedelic effects, it’s incredibly simple, and no two sauces look the same. To make a water bath at home, all you need is acrylic spray paint and a large water bath.

Hydro-dipping shoes not only give your shoes a classy look for your shoes but also make you stand out. There are a number of ways to keep your Hydro Plunge paint looking new and clean by coating it with a distinctive splash sealer (available in tool shops with a matte, semi-gloss, or gloss finish). To make hydro-plunging shoes, apply an even layer over the piece of clothing and let it dry for a couple of hours. Simply apply the sealer after the item is completely dry.

DO YOU THINK THE DESIGN OF YOUR HIDRO DIPPED SHOE IS WRAPPED AND REMOVABLE?

No. Hydrographic that incorporates pressure driven trickling is likewise called Hydro plunging and is a paint-based printing measure. When the expected paint substance is painted and dipped in the water they are secured with an automotive-grade clear coat, while this clear coat is a long-lasting change, but you can still change it if you want, and one of the best things about dipping. in water. is that you can also paint it as many times as you want.

Durable

There are people who are confused if their hydraulic immersion shoes are durable or not, since all of all hydraulic immersions are secured with a varnish that is automatic, the finish of hydraulic immersion shoes is as similar as it is resistant as a paint of your vehicle.

There are companies that manufacture shoes that make custom printed hydro-immersion designs, and the good thing is that they are not expensive, by using this you can make your shoes look dazzling like your personality!

Hydro-soaked varieties

Using hydro-diving, there are a variety of different materials that hydro-dipping is done nowadays. The often hydro-diving materials incorporate different plastics, wood, different metals, boats as well. However, since the material is not porous, it can be used for hydro-diving.

Hydro soaking wheels in the area

There are different companies now offering different models of hydraulic dipping for the wheels as well. On an authentic note, most wheeled hydraulic dipping suits are painted or powder-coated, and all hydraulic dives are also secured with varnish so they won’t stay on the wheel materials any longer time.

Process of hydro dipping

It’s a similar cycle to painting your vehicle but in the middle of the painting and painting, the hydro-dip is applied. Hydro-diving, or hydrography, is a typical strategy in which images are applied to hard surfaces. This printing technique includes some printed designs that can be applied to any three-dimensional surface. Hard metals, plastics, glass, wood, and various materials can be optimized with printed designs using hydro-dipping. In fact, individuals had their own bespoke vehicles that used hydro diving. The innovation was first carried out on a car in the mid-1980s. Since then, various methods of using these hydro dips have been discovered. In the case of bikes, hydro-diving is ideal for wrapping, as it holds firmly and firmly on the edge. It bends unchecked, but with fewer errors in the condition of the wheels. Hydrographic can be covered up so a defensive clear coat can be applied.

Inner story of hydro diving. When you hydro dip your shoes, the cycle starts printing. A different color design is created and that design is then printed on a water-soluble film. Before giving the shoe the final design to be applied, the shoes must be painted before the final design is applied to it. Candy paint or colored paints can also be applied to the hydro diving shoe.

HYDRO DIPPING TECHNIQUES

TECHNIQUE NO # 1:

MARBLE PAPERS

There is the same old saying "that also holds true for Hydro Dipping or Hydrographic. A comparative strategy has been used for over a thousand years to apply designs that look like marble to paper. You may have seen these beautiful papers in service stores.

Marbled papers are delivered by applying oil-based inks to the outside of a water plate. Whimsical and complicated examples can be achieved by blowing the inks or mixing them carefully. A sheet of paper is indirectly fixed with alum and then laid on the required surface. The paper is then removed and allowed to dry, while the tank is cleaned and rinsed with outstanding ink before the next shading begins. So what are you waiting for? Try using the gorgeous marbled paper to dip your shoes.

TECHNIQUE NO # 2

HYDRO DIPPING SPRAY

Shower Can Hydro plunging is the high level phase of plunging that is done on marbled paper and is finished by applying it to three-dimensional components. This method can be used for 3D prints and different parts that have the same structure as each other can also retain shading. In case you are not sure about this, use sandpaper to get a suitable surface. For more puzzling shapes, the best method is sandblasting with caution. Next, tape down all the pieces of your piece that you would rather not submerge with water. You can even equip makeshift handles with tape to make sinking easier. Fill a plastic compartment with water. Make sure the compartment is deep enough to fully lower the 3D printed parts. Currently to the great part! You can utilize any standard acrylic sprinkle paint. Hydraulic immersion is an incredible opportunity to use old bottles that you once used for spraying. Sprinkle the water over the shoes and also add showers containing the paints in various places on the water’s surface to create puzzling designs for your shoes.

Your final draft of the custom design is now ready. Shower until you are happy with the look you want for your shoe design. Gradually lower the part into the holder at a very steady rate. You will see the skimming shade fold and stick over your shoes, practically like a blanket. When in doubt, dip things into a 45 ° point for great results. In either case, you can bend on different plots for different effects. The corresponding design criteria also apply to the stimulation.
At the point where you feel like the paint is ruining your custom design, remove the excess paint that drifts on the water to prevent you from getting an unwanted second outer cover on your shoes. At that moment, you need to stop your designs and let them dry. Splash with polyurethane a few times to make sure the hydro-dip paint applies smoothly to your shoes.

TECHNOLOGY # 3

TRANSFER FILM

  1. The presentation of hydrographic exchange films some 40 years ago introduced the mass adoption of this strategy. These films can be printed with any intent required, typically with a warm-up design, to achieve reliable quality and a uniform appearance.
  2. Hydro-immersing with moving films requires equipment that is slightly more detailed than what we found in the latter stages of advancement. To do this, you will need two synthetic substances, one to set up the part (primer) and one to operate the part replacement cycle (activator).
  3. You will need gloves, spray, paint, sprays, and a tub to transfer the film. This method is almost the same as hydrographic shower paint and can be used for 3D printing and printing the different parts with the same design. Make sure the surface can accommodate shading. If you’re not sure about the shade, use sandpaper to get a suitable finish. For more unpredictable designs and shapes of your shoes, careful sandblasting is the best approach. Next, tape off any parts of your shoe that you would rather not hydro paint. You can even use an emergency tape handle to make it easier to dive in.
  4. The previous step is entirely up to you, you can skip it if you want. Depending on the hydraulic dip film you are using, you can start with a base coat of paint. Some films are transparent and allow the base coat to radiate.
  5. Make sure to apply primer while doing this and also wear a mask all this time. Primers allow your shoe to adhere to the film. Now let it evaporate because sometimes this can take up to two hours.
  6. Fill a plastic compartment with water. Make sure the bracket is deep enough to fully lower the 3D printed parts. The water should be between 25 ° C and 30 ° C (or 77 ° F to 86 ° F). Cut the hydraulic dip film to the correct size. Tape around the edges to prevent the film from moving up. Hold two contiguous edges with your hands. At this point, you should gradually let it float above the surface of the water, first leave the two edges that you are not holding; in this situation be sure to do it properly, there should be no air underneath the film. Allow the film to hydrate for 60 seconds (times may vary). Actuate the film by splashing it with the activator. While doing all this work, wear a mask for protection.
  7. Lower the part gradually, however, with a constant movement into the compartment. You will see that the slip film folds over your piece practically like a cover and sticks to it. When in doubt, you must immerse the designed item at 45 ° point to achieve excellent results.
  8. At this time, remove the excess film that runs on the water to prevent an undesirable second coat from covering your shoe. At this point, you can let your shoe dry. Gently wash the rest until only the film is left and allow the shoe to dry. To ensure waterproof paint, spray it with polyurethane.

Technology # 4:

Hydro computational immersion

Hydraulic film dipping has been around for a long time and has been achieved and people now prefer to use this old hydraulic dipping technique more. In any case, common films are limited to repeating designs. It’s certainly suitable for applying an outer coat on military gear or patching up your old bike with carbon fiber designs. Enter 3D Printing which is the hydro-immersion company and its analysts from Zhejiang University introduced a cunning technique to exactly fit the hydrographic exchange film on 3D printed objects.

They created recreations that envision how the movie will bend over a given STL record. In light of these created designs, an open shape of the graphic cover is printed on hydrographic film. Using metal housings, the hydrographic exchange film is placed at a particular location on the water surface. At last, the 3D printed object descends into the tank at a controlled speed. Computational Hydro Dipping, as it is called, works admirably with strongly bent items, similar to circles.
Additional difficulties when using this technique: the objects represented by it undermine and cause huge Z-breaks. However, it has been shown that even puzzling 3D prints can be effectively shaded with numerous hydrographic dipping passes.

Since this technique was unveiled in 2015, it has been repeated by different analysts. Form labs (a hydro dive company) even put a guide on their site that guides you through the entire hydro dive cycle in detail. Makes a very intricate DIY adventure; however, it is also possible to change the shape of the designs. If you sometimes need to try this at home, be sure to use the inkjet printable hydrographic film also available from Amazon. HYDRAULIC IMMERSION KITS Hydro dip your shoes using the following kits. DODIN’S MARBLE START KIT Go to your elementary school with your starter unit on paper marbling! Dive into creating cool designs and give your shoes unique designs and also surprise your loved ones with these cool designs. This package includes paint, brushes, papers, defensive covers, and decorative sheets, a pair of scissors, marbled paper tests, an estimation cup, two pointers, five pipettes, a plate, a mixing stick, and a guide along with instructions on how to create shoe designs immersed in water.

MAKE CUSTOM HYDRO DIPPING FOOTWEAR AT HOME

  1. Bring a new and perfect pair of white shoes to redo. Prepare your shoes for this soak cycle by cleaning the shoes.

  2. A polished tape job is needed to ensure a decent result. Generally, it is normal for the duct tape to tear, cut, and cover the important parts of the shoe that you do not plan to paint.

  3. An X-ACTO blade can be used to decisively cut the tape and ensure quality footwear customization.

  4. Take a tub or plastic container and start filling it with water.

  5. Be sure to use Rust-Oleum oil-based shower paint and splash the paint at the focal point of the tub of water. An example ring will begin to conform to the outer edges of the bracket.

  6. When you need to use more than one shade, substitute the splash shades at the focal point of the tub. After showering and swapping on different occasions, mix up the paint combination to make a beautiful plan on the water.

  7. Be sure to wear cover and elastic gloves for safety. The paint will not come off any item, material, or garment when spilled, so be careful!

  8. Pick up the cleated shoe and turn it so that the sole is facing upward. Carefully lower the taped shoe into the tub of water (painted) and begin curling the shoe after the shoe is fully lowered. After the shoe has held onto the water support, take the shoe off just a few seconds after doing this. It does not take long for the paint to adhere to the shoe.

  9. Rehash this cycle for the subsequent shoe.

  10. After taking off the shoe from the plastic tub, make a protected spot for the shoes to dry. Let the paint dry for at least 24 hours.

  11. After the shoe has completely dried, eliminate the tape from the shoe to see your end-product.

So, if you wish to additionally redo your shoes with shoe paint or other graphics, grab your kit and start with the process. Do not hesitate to draw whatever you plan to be made on the shoe.

CONCLUSION:

Hydro dipped shoes not only give your shoes a unique style different from other people but also make you stand out of the crowd, and you will be praised for your fashion style as well. There are different companies that offer customers to buy hydro dipping customized shoes. There are various techniques that you can use for hydro dipping your shoes at home as well. So, start making your own customized shoes.

Hydro Dipping Shoes

Hydro Dipping shoes are paint laid on the surface of the water, then transferred to the shoes by soaking, it gives swirling abstract paint effects, is amazingly simple and no two dips will ever be the same.

What is hydro dipping?

This is a method of applying the printer design to three-dimensional surfaces. The end product considered a decorative art.It’s equivalent to painting a vehicle, however among painting and lacquering we apply hydro-plunge.

Uses of hydro dipping

Hydro dipping used to decorate items ranging from whole off-road vehicles and car dashboards to small items like bicycle helmets or other automotive trim. The thing can be absorbed water and can be painted utilizing customary methods, at that point the hydro dipping cycle can be utilized.

Protection of hydro dipping shoes

Shoes that are soaked in water are protected by an automotive lacquer, the finish is just as durable as the paint on the car. Hydro-dipping is a paint-based printing process, when the shoes are painted and soaked in water, they are protected by an automotive-grade clear coat, while it is a change permanent, if we want to change it, we could just paint on it.

Materials that we can hydro dip

Different plastics, wood, different metals, and significantly more hydro plunge. If the item or material is non-porous, we can generally soak it in water.

What causes hydro dipping failure?

If the protective clear coat is scratched, it will cause a hydrographic finish failure, similar to the finish on a car, the paint can be scratched if the product is abused.

Water temperature for hydro immersion

Use lukewarm water around 70-80 ° F, when the water gets too cold, the paint looks dull, and too high a temperature starts to melt the plastic.

The best paint for hydro immersion

Acrylic spray cans with acrylic paint are best for water immersion because they float to the top as a thin film and easily stick to shoes or other objects you want to paint.

What is the hydro immersion activator?

Hydro Dipping Activator is a chemical used in the dipping process that makes everything possible. The chemical is applied to the film after the film has finished hydrating and is called an activator. When applied, it causes the film to dissolve and liquefy the ink.

Best colors for hydro dipping

Transitional shades of gray, ashy pink in combination with dark brown create a very pleasant combination. For the decoration of the bedroom, you can use shades of gray as the main color, select lighter shades for walls and dark ones for furniture and textiles.

What color of shoes is ideal for hydro dipping?

The ideal shade of shoes for hydro plunging is white since it is acceptable to work with a clear canvas, however fundamentally, everything shoes can be hydro plunged treatment.

Do hydro-soaked shoes crack?

Hydro dipping paint is truly adaptable, planned not to break, strip or drop if the calfskin is appropriately arranged. Apply very thin coats and let them dry before adding more. To keep this paint, add a finisher.

Hydro dipping of colored shoes

Twist the paint in the water using a stir stick, until a cool pattern forms, holding the sole of the shoe, dip it into the water, and then scoop it out. Try not to leave the shoe in the water.

How long does the paint on the shoes last?

It can last up to 3 years if properly stored at room temperature. Avoid sunlight and stay away from heat sources when not in use. Keep shoes separate.

Hydro dipping is a very clean and fine process that makes the shoes beautiful and looks great after hydro dipping and is a fun activity.

Hydro Dipping Shoes

Hydro-soaked shoes are a great idea. Sometimes we get shoes as a gift or we don’t like the old color of the shoes, then hydro-soaking will be the best option. Possibly you have some sort of old white shoes or perhaps you don’t care for your present pair of shoes then you can attempt it. It’s a very easy process so be prepared for it.

What is hydro soaking and how to soak?
Hydro dipping is a process in which we will add a coat of paint to the surface of the water and then we soak any object that we want to paint in a unique color. Hydro-dipping is also known as dip printing, hydraulic imaging, or water transfer printing. Hydro-dipping is a process by which we can apply graphics to objects. Individuals have been utilizing this cycle for quite a long time. Automotive industries and other fields use it in different ways. This process is used to produce game controllers, guns, helmets, etc.
The steps included in the process of hydraulic dipping shoes are appended below.

1- Work preparation/collection of materials for hydro dipping shoes: -
This is the first hydraulic shoe dipping process. First, you need to decide what color/design you want to apply and which shoe to soak. You need to prepare the item for soaking in this step. The preparation process is just a process of painting any shoe, in which you will properly clean your shoe. Then you need to sand/scrape the item. Then you apply a base coat and a clear coat.

1- Item selection for hydro soaked. We select shoes for this purpose.
2 to 3 or more colors of spray paint
3- We need a bucket deep enough so that we can easily soak the object we want to soak in hydro.
4- Water as needed.
5- We also need a mixing utensil. Which one will be used to mix the paint?
6- Gloves that can be discarded after use.
7- Remove the laces from the shoe if this is the case.

2- A primer:
It’s the first coat of paint. It adheres to the film and also to the secondary color. We will use the lightest color from our available colors as is our basecoat. We make sure that our fingerprints or other things don’t touch or mist up to achieve a smooth finish. After this process, the product may take about 23 to 24 hours to dry. If your shoe is already light, you can skip this step.

3- Prepare the paint for the hydro diving shoe: -
It is the 3rd part of the hydro diving shoe process. We have to check that the shoe needs to be dry. We’re going to put water in the bucket. It’s about 2 or 3 gallons. We will take turns adding colors to the water. We will spray the paints in water until we have the desired amount of paint in the water. After you stop spraying, paint the surface of the water. Check whether the entire surface of the water must be covered with paint.

4- Hydro diving of the shoe: -
It is the 4th part of the hydro diving shoe process. When paint takes up space on the surface of the water and is prepared. Wear gloves and take the shoe off carefully. Slowly dip it in the bucket. Move it slowly around the paint. Slowly take off the shoe, then soak it in cold water to allow the paint to sit properly.

Hydro diving shoe with adhesive tape
For the most part, individuals need to utilize the hydro plunging shoe measure on their white shoes and they would prefer not to totally change the show or need a few regions of the shoe to be the same after the hydro diving shoe process. In this case, you can do it with the help of duct tape. You need to cover the show areas with the tape that you don’t want to change.

What is the best color for hydro dipping shoes?
Acrylic aerosol cans are the best paint for the hydro diving shoe process as these colors cover the water with a thin film, making shoes sick easily. You need to be very careful when using spray because spraying closely can cause bubbles to appear on the surface of the water. The best color for hydro diving shoes must have the properties of flexible, durable, and good. You can use it comfortably and it should be of a quick-drying quality.

Best color for hydro diving shoes

1- Rust-Oleum Painter’s Touch Multipurpose Spray Paint for Hydro Diving Shoes: -
This spray paint is best for the hydro diving shoe process as this paint is specially made for surfaces such as masonry, plaster of Paris, and metals. The paint is long-lasting and dries quickly. In addition, it is based on oil, which makes it repellent to water. For all of these characteristics, it is best to use hydro diving shoes.

2- Rust-Oleum Universal All Surface Metallic Spray Paint for Hydro Diving Shoes: -
This spray paint is also very suitable for use in the hydro diving shoe process because, as the name suggests, it has a metallic color and an oil base. It is suitable for surfaces such as wicker, plastic, and fiberglass. When using this color, the shoe dries in about 29.59 minutes. It’s also long-lasting.

3- Krylon Color Master Paint + Primer for hydro immersion shoe: -
Krylon Color Master Paint is also best for water immersion due to its quick-drying quality. It is a paint + primer as per its name, so it is not necessary to apply the primer before hydro-immersion due to its quality of adhesion to any surface. It also has a very nice nozzle that is not available in other spray paints. With the assistance of its spout, you can without much of a stretch shower. Its nozzle is even so comfortable that during spraying you will think that you are not pressing the nozzle.

4- Rust-Oleum American Accents Spray Paint for Hydraulic Immersion Shoes: -
Rust-Oleum American Accents Spray Paint is commonly used on hydraulic dip shoes because it provides the best satin finish. It is also used for surfaces such as metals, plastic, and wood. This paint will dry in about 19.59 minutes.

Frequently Asked Questions:-

What are the best colors for immersion in water?
Selection of the correct color scheme is necessary. As we know in the entire hydro immersion process. The most important component is the color scheme that you choose for this purpose. We know that the base coat is the first coat for this coat. coat and we can customize the shoe in different color variations.

How expensive is water immersion?
In the United States, many hydro dipping experts charge roughly $ 80- $ 90 per wheel. which includes the cost of ingredients and customizations, if we take this process as a wheel paint, the charges may increase.

Do Hydro Immersion Shoes Last?

Hydro shoe plunging is the way toward altering the shoe utilizing water-based paints and different adornments, otherwise called hydro illustrations, this impact keeps going longer than numerous years, yet if there should arise an occurrence of scratches or some other inconsiderateness, it won’t keep going long.

What temperature must the water be for immersion in water?
The biggest mistake hydraulic charts make is that they use extremely hot water whose temperature is between 74 degrees Fahrenheit to 79 degrees Fahrenheit or 22.8 degrees Celsius to 25.7 degrees Celsius. Over 80 degrees Fahrenheit can also be used in this hydro dip shoe process, but it doesn’t seem necessary.

Do shoes submerged in water crack?
Here are some important tips to help us avoid chipping or scratching.

• Do not mix paints belonging to different brands because one may be of good quality and another may be poor, so their consistency may not match.
• When applying paint layers, keep one thing in mind: do not apply too thick a coat, this can cause cracking problems.
• Keep the water immersion shoes away from direct heat, this can damage the quality of the water immersion.
• The directions of application of the layers of paint are very important, the shoe must be painted in the direction from the layer in which the shoe flexes in this way we can avoid cracks in the shoe.
• Using the paint sealer is basically a coat that can save the effects of hydro immersion. Its soft coating will prevent any stain or water from spoiling this hydro-immersion effect. Leave it on for about 24 hours after application and then let your shoes dry completely then you can wear them.

Does Hydro Dip come off?
The primer coat is the first coat of paint when the shoe is submerged in water. All other coats depend on the base coat, if the base coat will remain fresh and stable, the immersion in water will be lost longer. Because all hydrographic designs are used to print with the same type of inks. So there will be no problem according to the specific pattern for the color schemes you choose. Lastly, the final step, an automotive-grade will clean the coat to achieve the best product finish.

Hydro plunging shoes are getting well-known step by step like originator shoes you can likewise redo your shoes agreeing into your dress. DIY Bath ■■■■■ they are the same color and enhance your look and fashion sense.
Hydro-dipping is a process in which we pour different inks, paints, and enamels into a liquid mainly water. On the surface of the water, a thin layer of paint is made which sticks to our product, for example, shoes. New shoes are not necessary, you are using your old one with a new look.

Marble effect

Most hydraulic immersion shoes have a marble effect with two or more than two colors for your choice, the marble effect looks beautiful, such as yellow and red, gray and black, blue and red they look attractive.

Hydro immersion method

Now we will discuss this process in detail, the first step is quite easy and fun, but the second step requires some time to dry the shoes well. Here are the things needed to make hydraulic dip shoes.

A rectangular-shaped tub and 3/4 full of water
A strong table
Primer paint or primer
Spray paint of different colors
Matte finish spray
A pair of white shoes
Scotch tape
A pair of gloves

Method

First, place your tub on the table and fill it with water, then put on gloves to avoid hand sprays. Then on your pair of shoes, spray the primer color thoroughly, the reason for this is that our color will later coat the shoes with a vibrant and finished look.

Now spray from a distance of half a foot on the surface of the water for 4 seconds and then you would do it in a ring shape. Then, in its circular spray one after one, the marble effect will grow and a thin layer will appear on the surface of the water.

Now very carefully dip your shoe one by one and take the shoe at the bottom so that the layer adheres to the surface of the shoe. On the other hand, remove excess color and place the shoe in the sun to dry.

It would take more than 24 hours to dry it completely. Normally it takes 15 minutes for spray paint to dry in the hydro dip method, the water remains under the paint film. Once it dries completely, the color will remain and you can wear it after lacing.

On the core and unwanted paint, areas stick the masking tape so that the color stays away from the sole.

What color scheme should we use for hydraulic immersion

Each color combination that suits your needs and according to your dress. For kids, Sharp colors can be used as sharp green and yellow hues that look refreshing on sunny days. And for the little ones, cheetah print, army print, circle paint, and embellished fusion are the best options.

Precautions in hydro immersion

Since it is a fun activity but we must also take into account some things that are listed below …

Do not use if you are allergic to paint

If you are allergic to paint, because the smell of spray paint is very strong and unremarkable along with your breath, it can enter your nose and cause extraordinary sneezing, coughing, or nausea.

Do not double coat paints

Once you submerge the shoe in water and the paint sticks, do not wet it again to give it more color, the first effect will demolish and the film will thicken and lose its marble effect.

Do not make thick film

Just spray for 3_4 seconds to make the particles become thin on the surface. If you increase the time, the spray layer will be thick and after sticking to the shoe will get dirty.

Clean paint residues with a kitchen towel

After a shoe, paint remains in the tub, but don’t worry, you don’t have to change the water every time. Simply remove this dry paint with a kitchen towel. It would completely remove it.

In addition to the shoe, other items can also be restored

You can also customize your toys, phone case, journal covers, and other favorite things that you have your own identity for. Mobile covers can also be used for large scale orders.

24 hours drying time

You need to wait at least 24 hours for complete dryness. Because under the paint, the water remains wet, which is why it would take longer for the paint to dry. This process is very important as it can damage all of your work if you’ve applied matte spray to wet paint.

Spray from a distance

Keep a distance of half a feet. If you keep more distance the spray will ■■■■ up and as you get closer it would form a thick layer that we need to prevent from both. So watch out for the distance.

Avoid air bubbles

Air bubbles under the paint layer can tear the layer. If the bubbles are too small, don’t worry about them going away after they dry.

Summary

Above we discussed the hydro diving shoe method, it’s fun and demonstrates the method and precautions. Now we can say DIY is a fun and unique way to do things too. It empowers you to make your design, style, and character.

Pondering hydraulic immersion shoes? … Read ahead and get yourself an intricate pair of hydraulic dipping shoes. The hydrographic printing measure, additionally called hydro-drenching, comprises of the submersion of any article (for instance, a shoe) through an inked film that is set on the outside of the water and broke down with a dissolvable.

immerse comes from the English “to dive”.

In this cycle, the pieces to be printed are exposed to extraordinary planning before drenching in the tank for a hydro move.
The object (eg a shoe) to be personalized must be perfectly clean, it is cleaned with specific products that remove all residues, fats, silicones, etc., which can alter the hydro-transfer printing.

What material is needed?

This is a question that regularly comes up from people who want to dive into the water. Most importantly, you need an artwork corner with the air blower, hoses, pneumatic ■■■■■■■■■ and weapons to shower items, groundworks, and stains. So all you require is a particular splashing tank for the method. It is additionally important to furnish yourself with a shower to gather the pieces and a broiler and drying space to store the completed and printed pieces.

Tips to prepare for hydro diving:

Use a specific primer
Apply a primer and sand it with an abrasive sponge and a little washing-up liquid (to remove surface tension).

So all you require is a particular splashing tank for the method.

This creative cycle, known as hydro-plunging, hydro-move, or even hydrographic-move, is a plunge printing strategy utilizing inks.
which allow the application of three-dimensional images and effects by immersion. in water (in a water tank).

Method of hydro-diving your shoes

Hydro-dipping is therefore a 3D printing process in which a part is immersed in water through a hydrographic film deposited on its surface.
The hydro transfer is applicable to any type of object with a hard surface as long as that surface has been prepared and primed.
The first step in the hydrographic transfer process is applying the background color (we use paint, usually a matte body base). Care is taken to sand the surface well so the exchange film sticks to it without issues.

The hydrographic film comprises inks imprinted on an extremely slight and light polyvinyl ■■■■■■ film that drifts on the outside of the water when it is set in the hydro drenching tank.

A solvent-based activator sprayed on the film will dissolve it. The part is then painstakingly plunged through the layer of ink, which stores and covers the entirety of the forms of the article.

After removing it from the water, the part is rinsed with lukewarm water, which removes film residues. The part is totally dried and afterward painted with body paint to ensure the hydrographic example.

Do you need to sand before painting?

No, besides, the film would not stand up to grinding because of its fragility and finesse.
The varnish hangs directly on the ink.

How do I install a hydro diving workshop?

A room of 100 to 200 m² is required, with a preparation room, a grinding room, a painting room, a soaking room, and a temperature-controlled storage room.
The primer painting phases, as well as the painting phase (especially), require a paint booth to extract the fumes and avoid dust.
The hydrocracking elimination can be conveyed outside the lodge. However, sufficient air circulation is required when spraying the activator (100% solvent).
The necessary equipment consists of:
A grinding station, a ■■■, and a compressor, a customized soaking container and supports to hold the parts during the soaking.

Which model of the soaking tank to choose from?

The Wtp300 is the littlest model, it permits effective and proficient manual drenching. The reservoir is economical and affordable compared to automated hydraulic transfer equipment reserved for industrial installations.
The WTP300 manual hydrographic exchange splashing tank estimates 2.20 m by 1.20 m in width and 1 m in stature (300 kg) (click on the connection to see the item sheet)
It permits to absorb to 200cm by 100cm.
It is made of stainless steel, works in 220V (6KW).
It offers a warming framework and a water distribution framework
It has a programmed gliding valve for filling and a water siphon.
Its price: € 4,800 excl.

Hydrography - also known as transfer printing or dipping - involves applying a film of ink to a surface

StardustColors has been established since 2006 in the field of personalization paints. A pioneer in the field of hydrographic exchange, StardustColors is a wholesaler of the scope of expert hydro plunging machines, manual or programmed.
The site offers a scope of various models of hydrographic movies, sold by the square meter or in moves of 100 m² or 250 m².

StardustColors isn’t the lone wholesaler yet in addition producer of scope of activators, with new superior plans since 2016 which permit an ideal disintegration of the film and a superb hold.

Are there blank films for printing?

Yes, blank polyvinyl films

Note: their cost is by and large a lot higher than the cost of printed films. In any case, they permit simple printing with most printers.

Frequently Asked Questions (FAQs)

1. What are the possible uses of hydro diving?

  1. electrical and electronic
  2. Furniture and kitchen
  3. Auto parts
  4. Interior and exterior decoration materials

2. Are hydrographic prints UV resistant? Is it sustainable?

Yes, the inks used are UV-resistant and their resistance is increased by the varnish deposited on the surface.
We like to let our products speak for themselves: Some of our largest customers are boat manufacturers with very high equipment standards: Many parts spend most of their time in direct sunlight (example: instruments, dashboards).

3. Which product do we need?

  • Base for painting or priming
  • Transfer film
  • activator
  • car paint

4. What is the cost?

A hydro transfer is very economical. With a price per film of € 5 to € 15 per m².
Furthermore, the technique goes beyond the usual problems associated with conventional methods such as hot printing, screen printing, etc.

5. Can incorrectly print items be reprinted?

Truly, inadmissible prints can be re-tempered the same number of times as wanted.

6. In what form does the transfer film come?

In roll form of 50, 92, or 100cm. Storage can be done for 1 year if the film is stored at the proper temperature and hydrometry.

7. How is hydro-immersion protected?

Use a clear spray sealer.
To keep your paint by soaking in fresh, clean water, spray it with a clear spray sealer (available at hardware stores with a matte, semi-gloss, or gloss finish). Spray an even layer on the item and allow it to dry for several hours. Apply sealer only after an object is completely dry.

8. Is hydro-dipping compatible with all materials?

Almost because hydro-dipped films are extremely flexible and adapt to all substrates. The significant thing is to appropriately set up each sort of substrate and to utilize a groundwork explicitly picked for this kind of material. At that point, it is conceivable to print on calfskin, plastic, glass, cement, or metal.

9. In terms of preparation, what are the precautions to take before dipping your part?

Above all, we want to make sure that the hydro-dipped film adheres well to its backing, so you don’t have to use just any primer to soak parts. There are specific undercoats that allow you to adhere to the transfer film without sanding while other types of paints or primers hardly stick even with sanding

At that point, it is important to regard the principles of the craft of painting with an entirely perfect, sound, without dust part and liberated from oil or silicone. Let’s talk about the background color: we need to take this into account and choose, especially because there are transparent, semi-transparent, or completely opaque films. If a transparent film is used (example: bubble pattern, carbon …) the primer will be visible and should be selected according to the desired surface. And as for the other films, which are opaque and heavily colored, they are placed on neutral backgrounds, i.e. homogeneous gray or brown or even white, it doesn’t matter.

10. In what various stages can the hydro-plunge film be moved?

The correct diving angle is approximately 45 °, the movement should be slow and steady. Of course, it is necessary to ensure that the film is well activated and this is the difficulty of the technique: It is necessary to adjust a set of boundaries, for example, the thickness of the film, the temperature of the water, and the portion of splash activator. For this, it is an experience that helps and training with a specialized professional for one or two days is recommended.

11. When the part has been taken out from the water, what are the completing advances?

Is it conceivable to reproduce a section in the event that it falls flat?

First of all, you don’t have to remove the lodged part right away, you should leave it submerged for a few moments and gently pull it out. We can then wait a few moments before delicately rinsing the freshly printed part by first using cold water with a shower head to fix the film which is still soft and very fragile. The aim is to eliminate the pieces of residual film and also to eliminate this gelatinous film on the surface.

Yes, it is entirely possible to print on freshly dipped film by simply allowing a drying time of 10 minutes to make the bottom layer feel dry. Obviously, on the off chance that you have a straightforward example, you should begin once again by applying a shaded preliminary without fundamentally repacking everything.

About the final varnishes: they are used to protect the thin, dried layer of the printed decoration (protect from sun, water, gasoline, abrasion, etc.). You can utilize totally any paint, water-based paint, epoxy, body, and so on There is no known incompatibility with hydro dip films. You can also apply the varnish to the transfer film a few days later without sanding, as the printed decorations are very easy to stick.

12.To make a marble impact, there is another strategy called whirling which includes saving a scope of tones in the water. Tell us more.

Yes, we’ve seen very nice videos here and there, especially on YouTube, showing people how to apply paint and paint to the surface of a container and soak a part with apparent ease. I think this is quite achievable using paints that are not water-based, such as glycerin or polyurethane paints.

Conclusion

Used for several decades in the industry to decorate all kinds of everyday objects, hydro-graphy is this magical technique that allows you to almost instantly personalize any room by adding color and three-dimensional effects. If a certain number of manufacturers use this transfer method to finish their 3-D printed parts, it will become more famous, as it is still under-exploited for the contribution to classic brush or spray painting techniques.

Hydrodipping shoes, otherwise called plunge printing, water move printing, and pressure-driven imaging can be a special cycle that permits you to utilize illustrations on practically any three-dimensional article. There are many diverse material substrates that film is often applied to, such as plastic, metal, wood, and more. Below are the steps within the immersion process and what you need to know.

Everything you need to know about Hydro Dipping shoes

Tools required for Hydro Dipping shoes

1.Old plastic tub

2.Gloves

3.Facial mask

Material requirement for hydraulic immersion shoes

  1. pair Vans can wear other cloth shoes; whites are recommended.

  2. 3 cans of Rustoleum paint choose colors that are quite different from each other.

  3. Painters tape is a must for Hydro Dipping shoes.

  4. Plastic shopping bags can also use newspaper, but this is usually a great way to reuse old shopping bags.

  5. Stirring rod Use a metal or silicone stirring rod. don’t use a wooden stick, the paint will stick and ruin the swirl.

Instructions

Preparation

Before you start, eliminate the bands from your shoes. Fill the shoes with old plastic bags or newspaper.

Using painter’s tape, tape the tongue of the shoe and each of the exposed plastic parts of the shoe. We didn’t tape the only one, if you don’t want the soles to be discolored, then tape them as well.

The internal history of hydro-soaking. When you use hydro-soak on your shoes, the cycle begins with printing. a special paint design is formed, which design is then printed on a water-soluble film. Before giving the shoe its final design to apply, the shoes must be painted before the ultimate patterns are applied. Candy paint, or colored paints, can also be applied to the hydro-dipped shoe.

Soaking instructions

  1. First. Confirm that you have read all of the instructions and precautions on the paint bottle. confirm that you are working outside in a well-ventilated area. Follow the bearings on the paint bottle for security.

  2. When it was too cold outside, the paint “froze” too quickly and did not give an excellent soak. I might not recommend this project if it is below 50 degrees outside.

  3. Fill a tub halfway up with water.

  4. Spray the paint in the tub. it will “float” above the water.

  5. It is best to spray each color of paint on a separate area of ​​the tub. instead of all the others.
    We additionally found that 3 shades of paint worked in a way that is better than 2. If you want 2 color shoes, I recommend adding white paint to your color scheme.

  6. Using a mixing stick, swirl the paint in the water until a cold pattern forms.

  7. Holding the shoe by the sole, submerge it in the water, and then remove it.

  8. You need to jump gradually and tenderly and take off the shoe gradually too to permit the paint to stick. try not to leave the shoe in the water. Set it on the right track in and afterward straight.

Finish

1.Put the shoe on a shoebox or other box and let it dry overnight. do not remove the paint until the surface of the shoe is dry.

The inside of the shoe will take every day or two to dry completely. you fill the shoes with regular newspaper to aid the drying process.

How long does it want to dry?

The time it takes for your item to dry depends on the ratio when you complete the method. most often on a daily basis, you will find a product that dries in 20 minutes to an hour.

Remember that the main paint on the merchandise should wait 2-3 hours to dry. After the initial painting of the thing is done, you will want to make sure you can submerge the merchandise within 8 hours of spraying.

Rinse

Once you are done dipping, you will notice that the dipped item has a viscous residue throughout. This residue must be rinsed off. People do that in many different ways, using watering cans, garden hoses, and even the sink (again, not recommended because the activator has a strong odor) for the rinsing process. When rinsing, you’ll help speed things up by gently scrubbing the item as you rinse to help loosen the residue. Please don’t rub too hard, otherwise, you will rub the back of planning. You will know this once you are done rinsing because the item will start to feel dry and all the slimy residue will be gone.

Durability

Immersion in water is as durable as the paints and paints you use. If you use automotive-grade paint, your graphics will be as durable and luscious as replacement car paint. Different paints are used for various applications, such as automotive-grade paint (for tires and auto parts) or Cerakote (for firearms and bows). you would like to decide on the right paint for your project.

Conclusion

Hydro-soaked shoes can be fun through fun-filled times. Hydro-soaking can be a very neat and fine process that makes shoes look beautiful and it’s great after hydro-soaking and it’s a fun activity. Hydro dipping embellishes all types of everyday objects, hydrography is this magical technique that allows you to almost instantly personalize any room by adding color and three-dimensional effects.

Nowadays, hydro dipping has become a fashion. You can find many people on social media getting their shoes wet. Many people make it look very easy and child’s play to wet shoes with water, but it really isn’t. It looks fun, interesting, and easy to do, but you can also find people failing at it. Sometimes the results are not what you want and sometimes it’s just a total failure.

What is an immersion in water?

If you don’t know what water immersion is, let’s have a quick answer to the question. In very simple words, hydro-immersion is a technique in which paint is sprayed on the surface of the water and the matter to be immersed is put into water and the paint sticks to the object in a specific pattern. You can play with the colors and designs of your choice.

Purpose of hydro immersion:

If we talk about the purpose of this technique, immersion in water seems fun and interesting at first, especially if you like crafts. Immersion in water makes your shoes look different than normal. You can customize your shoes however you want and if you put them on really well, you can make your shoes look store-bought. If not so much, at least it’s a fun activity to try.

Types of hydro immersion:

There are two common techniques for immersion in water.
1 spray painting technique
2 Hydrographic film technique
Let’s discuss these techniques in more detail.

1 Spray painting technique:

This is a basic and most common technique used for immersion in water. These are spray paints. Simply spray the paint of your choice on the surface of the water and carefully submerge the object in the water. Take out the item and you can see paint on it.

2 Hydrographic Film Technique:

This second method requires a hydrographic film instead of spray paints. The hydrographic film is a thin sheet with a specific design. Instead of spraying paint on water, place a hydrographic film on the surface of the water, spray the activator on it, and immerse the object in the water. One of the advantages of using hydrographic film is that it gives you some kind of design rather than splashing colors like in the spray painting technique.

How to do hydro immersion?

Now let’s look at the process of hydro dipping shoes.

Materials you need:

1 Spray paint or hydrographic film
2 plastic container
3 Activator (in case of hydrographic film technique)
4 shoes
5 gloves
6 Water
7 tape
8 acetone
9 finisher

Prepare your shoes:

Start by preparing your shoes with acetone. Rub your shoes with acetone. It will help remove excess paint from shoes.

Glue your shoes:

Glue the parts of your shoes that you want to protect from paint, such as the bottom of the shoes. Use a craft knife to properly glue the small curved pieces.

Spray paint or hydrographic film fix:

“By then fill your compartment with water and scrub down paints or hydro reasonable film.” Spray paints on the water surface or spot the hydrographic film on the water surface and shower activator on it.

Soak the shoes:

Slowly dip the shoes one by one into the water and when they are completely soaked, shake them in the water and take them off.

Let it dry:

It is important to let the shoes dry completely, otherwise, the paint may peel off.

Use a finisher:

The last advance is to utilize a finisher to complete your shoes. This will help to properly adhere the paint to the shoes. You can use a mat or any other finisher you want.

Tips:

1 Don’t forget to wear gloves. While soaking your shoes, you can get paint on your hands, so it is best to wear gloves to protect your hands.

2 Do not use warm or cold water. Use room temperature water as it works best for immersion in water.

3 Check the size of the container before use by placing the shoe in it.

5 Common Mistakes People Make While Diving In Water

Soaking in water is not easy to do, although it seems easy. Only small mistakes can change the entire outcome of your hydro dive. Below are 5 common mistakes people make that make their water dive a failure.

1 Does not record correctly:

If you don’t glue the tape properly, the paint will get into the tape and destroy your shoes. You have to glue correctly and also select a good quality well-adhered socket so that the paint does not ruin your shoes.

2 Unprepared and finished:

Most people just tape their shoes up and submerge them in the water. The paint will not stick to the shoes for a long time. It is best to prepare and finish your shoes so that the paint will seal and not peel off.

Spray too close to water:

You should not spray too close to the surface of the water. Keep a distance and then spray. Spraying paint too closely will not allow the paint to sit properly on the surface of the water.

4 Water on hydrographic film:

When you have put the film on the surface of the water, make sure that no water gets on the surface of the film that is facing up. If waterfalls on the top surface, the paint will dissolve in water.

5 Without practicing:

Water immersion is not child’s play, you will not get perfect results on the first try. You have to try again and again and each time you will find some mistake that ruined your design or you will improve doing it. There is a lot to know to perfect yourself in hydraulic immersion. You have to keep practicing if you want to improve.

Conclusion:

Immersion in water is a famous technique that many people use, especially in shoes. It’s something fun and interesting that can help you personalize your shoes and make them look amazing. Although it seems very easy just by watching people do it, it really is not. There are many little things that can change the game of hydraulic immersion that you should know. You won’t get the perfect result just by doing it once. Like some other work, you need to rehash it for a specific measure of time, you additionally need to do it, again and again, to improve at hydro dipping.

Hydro Soaking Shoes are a trendy shoe hack that can be seen on a plethora of DIY and Pinterest sites. it has been very popular among creatives and artists who love to wear colorful and fancy items.

WHAT IS THE HYDRO DIPPING SHOE?

The word hydro means “water” and to soak means “to submerge”.

Hydro-soaking is a technique that involves immersing an object in water, covered with several colored layers. This procedure transfers the abstract colors to the elements you want to create fancy.

THE STORY:

Looking back in history, this hydraulic dipping technique is said to have been introduced to China by Mototyasu Nakanishi of Cubic Engineering in 1982. It was first used by the automotive industry to paint wheel rims and car interiors. This was done by industries around the world until in the 2000s people started to prefer to pack their household belongings.

WHY PREFER HYDRO SOAKING?

People prefer to use the hydro-soaking technique because:

  1. It is anything but difficult to utilize and takes less time.
  2. It’s really affordable.
  3. It can assist you with enlivening your ideal things.
  4. It can be useful to hide flaws.
  5. You can modify it in your number one tones and style.
  6. You can convert your boring shoes into cool and chic shoes.

HOW TO IMMERSE HYDRO ON SHOES:

ITEMS:

  1. Pair of shoes (preferably white or applied with a white base paint).
  2. Paints (colors of your choice).
  3. Deep rectangular bucket.
  4. Water
  5. Masking tape

VARIATION OF PAINTS:

People use a plethora of types of paint on their shoes depending on the availability. Many people opt for spray paints, acrylic paints, and emulsion paints etc.

Regarding quality and durability, it is suggested to use acrylic spray paints as they float upward in a thick film and adhere firmly to the submerged object. Other than that, the color stays intact on the shoes for a long time without letting the bright colors fade. Besides, it has quick drying capabilities,

STEPS OF HYDRO SOAKING:

STEP 1:

Take a shoe and tape the parts you don’t want to overlap with the color (like the sole and the logo).

STEP 2:

Take a bucket of water and fill it until it is five to eight inches below the surface of the bucket.

STEP 3:

Take your favorite colors of acrylic based spray paint and spray it little by little until it begins to form an abstract layer. You can use a thin stick to remove the colors and make the designs more abstract.

STAGE 4:

Take your upholstered shoe and dip it in water, sole side up. When you dip it, you can see the layer of paints spinning around the shoe. Make certain to wear gloves so you don’t stain your hands.

STEP 5:

Move your shoe a little so that it covers all the areas and take it off. Do likewise with the other shoe.

STEP 6:

Keep your shoes in a protected spot to dry for around 24 hours. After completely drying, remove the tapes and if you want to personalize even more you can use Sharpie markers to make great designs.

HOW DOES IT WORK?

Colors are insoluble in water because they are hydrophobic and form a layer on the surface of the water. Water is also denser than the colors, so it is the main reason for its insolubility. When an object is immersed in the water, the surface tension of the water causes the paint to curve around it, and this is how the entire process of hydro-immersion takes place.

COMMON ERRORS WHEN USING THIS TECHNIQUE:

The most common mistakes made with this technique are as follows:

  1. A second coat is usually applied if the coat does not cover the entire shoe. It is recommended to avoid the second coat. If you do this, make sure that the first layer isn’t wet.
  2. The use of an unequal amount of color loses its adhesion.
  3. Using two to three colors is very preferable because the abstract design is easy to carry.
  4. People usually rush in this process, mostly when the base paint has not completely dried out and they move on to hydro-diving. Let the base paint or primer dry to allow the paint to bond firmly to the shoe.

CONCLUSION:

There is no doubt that hydro-dipping is a very useful and incredible invention for applying the art of printing to desirable objects. Just the right choice of color and patience can make your boring shoes look cool and funky.

materials needed for hydro dipping shoes

Below is the list of materials needed for hydrodipping:

:o: Large, deep plastic container (container will have paint inside after hydraulic soak is complete)

:o: DIY Complete Hydrographic Printing Kit

:o: Object to soak

:o: Sandpaper to smooth the surface

:o: Rags

:o: Bucket of mild cleaning solution and water

:o: Vinyl, rubber or latex gloves

:o: Primer coat

:o: Base coat

:o: Top coat - Clear coat

best shoes to paint on

:athletic_shoe: NikeiD. Air Max 270 iD.

:athletic_shoe: adidas. mi I-5923.

:athletic_shoe: Vans. Old Skool Custom.

:athletic_shoe: Converse. A personalized star.

:athletic_shoe: SWEAR. Air 1.

can hydro dip be removed

Hydrography is always coated with clear varnish, your only two options are to strip the finish (best bet Usually the best medium is 100 grit aluminum oxide), this will not harm the integrity of the stock and will bring it back to the natural finish, perfect for duracote.

hydro dipping without spray paint

If you don’t want to use spray paint, use a hydraulic immersion kit instead. This is an alternative method.

how to hydro dip without spray paint

This involves placing a pre-printed water-soluble PVA film (“hydrographic film”) on warm water. To dissolve the film and activate the ink binder, you need to use an aerosol activator, but it does not require spray paint, which reduces confusion and fume.

hydro dip color schemes

Standard base coat colors for hydraulic dipping are white and sometimes beige for a camouflage pattern. But your basecoat can dramatically change the final look of a bath. Most films are designed to be applied over a white base coat and this is one of the reasons you rarely see white printed on film.

can you hydro dip without activator

If you’ve done hydrographic printing before, you know the activator is essential. And although the process can be completed without the activator, it will be a more difficult, more complex and less effective way. Modern technique requires the presence of an activator for a quick and easy printing process.

tape for painting shoes

Painter tape is the cheapest option and should be used everywhere by default. Vinyl tape is elastic and sticky, making it ideal for taping socks and sock linings. The duct tape I found is very suitable for sock liners, but it leaves a residue after being left for a long time.

Frequently Asked Questions (FAQ’s)

Q: Does the Hydro soak last the shoes

Hydrographic finishes are very robust and will last for many years under normal use.

Q: Is hydro soaking permanent?

Hydrography, also known as hydro dipping, is a paint-based printing process. Once your item is painted and water soaked it is protected with an automotive grade clear coat, although this is a permanent change, if you ever change your mind you can just paint above.

Q: What type of spray paint is best for hydro dipping?

Acrylic spray paint

Acrylic spray paint is one of the most preferred types of paint used by painters for all of their hydro-dipping tasks.

Q: Is the Hydro Soak waterproof?

Hydraulic dipping works because when the spray paint is on the water it does not mix, so when you submerge the object the paint adheres to the base coat providing a waterproof sealant to the exterior of the object .

Q: What is the best primer for hydro dipping?

Rust-Oleum Painter’s Touch Matte White Primer is the go-to solution for hydraulic soaking.

Q: Do I need to prime before hydraulic immersion?

The first ingredient required for hydraulic immersion is a primer. Promotes adhesion of the transfer film to the object. After applying the primer, allow the primer to dry before transferring the film to the part. This can take up to 2 hours.

Q: Is hydraulic dipping expensive?

Most hydrography stores charge around $75 to $80 per wheel, depending on labor costs and customizations. If the hydrotip is part of a wheel paint kit, the cost may be higher. Search online to find the nearest hydrography store and the prices they offer.

Q: Is hydraulic soaking easy?

When you have a complete hydraulic dipping kit, the process is easy and fun. You can use the designs supplied with the kit or apply a custom design to the film. You fill a container with water and lay the film on the surface.

Conclusion

Hydrodipping is the process of painting on anything. It is done using activator. You can do hydrodipping on shoes. the best shoes that can hydrodip are:

:athletic_shoe: NikeiD. Air Max 270 iD.

:athletic_shoe: adidas. mi I-5923.

:athletic_shoe: Vans. Old Skool Custom.

:athletic_shoe: Converse. A personalized star.

:athletic_shoe: SWEAR. Air 1.