How to draw a fish? You can draw a fish in some easy steps. Firstly, you should outline the fish. After that, you should draw the fish’s fins, scales, and eyes. Drawing fish is not a hard task if you read this article till the end.

 Drawing A Fish
If you’ve ever wanted to learn how to draw a cartoon fish, this video is for you. It doesn’t matter if you want to learn how to draw for the first time as an adult or if you want to share your knowledge with a child. To make drawing fun, each step has been simplified to the point where it is as easy to follow as feasible.
Before we get started with the fish sketching lesson, make sure you have all the necessary supplies. Graphite pencils, a sketch pad, and erasers will come in handy. That concludes our discussion! You don’t need to go to the shop since you already have everything you need.
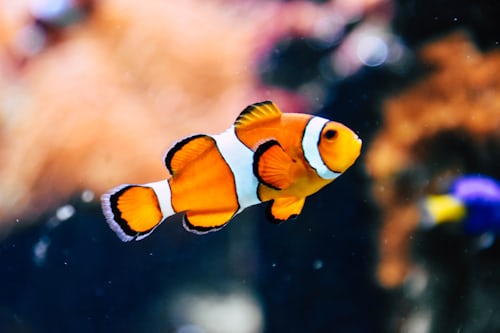
Keep in mind the basic body proportions of a fish and its head size and mouth location when sketching it. From species to species, the form and quantity of medial and paired fins (purple arrows in the figure below) vary. Species identification relies heavily on these traits, and omitting a fin from your descriptions or depictions might be misleading to your readers.
Summary
Additionally, if you’re interested in drawing more lifelike fish, I recommend that you have a look at some fish skeletons. Although it isn’t required to know the names of individual bones, having a basic awareness of the fish species’ skeletal anatomy will be beneficial in many ways.
Materials Required For Drawing A Fish
| Materials | Explanation |
|---|---|
| Eraser | Large ones that you can hold in your hand perform far better than simply the pencil tips alone. |
| Sharpie Marker | These fine point permanent marker pens produce beautiful black outlines, have an excellent tip for coloring, and do not bleed when they come into contact with water. Place them in a well-ventilated area and place additional paper below them to safeguard your tables. |
| Paper | I would recommend using standard sketching paper because it is absorbent and nicely holds markers. I normally use illustration board or acryl paper, but sketching paper would work just as well and is far less expensive than illustration board. |
| Prang Crayons | They also offer a few good brown tones that Crayola does not carry unless you purchase one of their bigger boxes of colored pencils. |
| Crayola Crayons | The dependable brand that dependably performs admirably. The 24 pack has some of my favorite golden orange and yellow hues, which appear to be a little richer and warmer in tone than the ones available from Prang. |
How To Draw A Fish In Easy Steps?
-
Step 1: Using your pencil, outline the form of the fish in the center of your page to start. Create reference lines across your page by creating a horizontal and vertical line that intersects in the center of your paper. The center is marked by the place where the two lines come together, and here is where you should create the outline. This will ensure that the fish is drawn in the center of your paper.
-
Step 2: Make a drawing of the fish’s Gill Cover. Draw a curving line within the contour of the fish to represent the gills, as well as a separation between the fish’s head and the rest of its body.
-
Step 3: Draw the Caudal Peduncle of the Fish after that. Draw another curving line on the tapering area of the fish’s body, just before its tail, to complete the picture.
-
Step 4: Next, draw the Pectoral Fin on the right side of the body. In this phase, we will be focusing on the pectoral fin, which is the fin that runs along the middle of the fish on both sides. Only one fish fin is visible because it is positioned horizontally, as seen in the figure.
-
Step 5: Complete the fins of the fish in their entirety. We will sketch the fins attached to the top and bottom of the fish, which are referred to as the dorsal fins and pelvic fins, respectively. From the dorsal fins, draw an extended curving form joined at its apex straight to the upper portion of the fish’s body. Then, draw an upside-down triangle shape to represent the pelvic fin at the bottom of the page. See, it’s that easy!
-
Step 6: Then draw the fish’s mouth on a piece of paper. Draw a linked downward and upward diagonal line on the corner of your fish’s face, making an outline that is comparable to the shape of a half rhombus.
-
Step 7: Make the large, round eyes of the fish. Create the eye by drawing a circle on the creature’s face. A second circular shape should be drawn within the eye to delineate the pupil. To highlight the iris, draw a small circle inside the pupil to the pupil’s interior. The impression of “sparkling eyes” is achieved by darkening the whole pupil while leaving the iris uncolored, resulting in a striking “sparkling eyes” effect.
-
Step 8: Once you’ve covered it with patterns, go to the next step. As seen in the figure, draw lengthy triangular patterns across the body of your fish. It’s important to alternate the placement of the forms, so start with the top-most triangle and work your way down to the bottom-most triangle, and so on.
-
Step 9: Draw a Mouthful of Bubbles. Create bubbles by drawing a series of circles over the fish’s head. You may get this effect by allowing the fish to appear to be breathing underwater.
In this picture, the fish has been completed. It’s only missing a few splashes of color to bring the fish to life! Our sketch of the fish is complete. Therefore, it’s time to be creative with color and finish your masterpiece! Here’s your chance to show off your artistic talents and your mastery of color harmony.
Start with a certain type of fish and work your way up from there. The fish’s designs may be customized to your liking. Angelfish have unique diagonal lines across their bodies, whereas typical carps have only a single layer of scales. Also, you may design your pattern to make a one-of-a-kind fish! Adding texture to your fins is as simple as drawing a series of parallel lines.
Structure the shape of the fin by drawing two curved lines that are related to one another. It is necessary to link both endpoints of the curved lines together to form the pectoral fin. A sideways oval with pointy sides should be the form of the object if it is drawn correctly.
Summary
Fishes are available in various hues, which vary according to the species. As a result, you’ll have a plethora of color possibilities to pick from when it comes to dyeing your fish. Have fun experimenting with different colors and watching as the fish eventually comes to life!
10 Quick Tips To Improve Your Drawing
Drawing may be described as the action of drawing marks on any surface using any mark-making substance, and it can take place in any medium. Anyone who can draw, according to this criterion, is a talented artist. If you can write your name, you should also be able to draw. Now that we’ve established that, we can all agree that some are more talented at drawing than others.
Several elements must come together for someone to become proficient at drawing. The following are some of these factors: a strong desire, training, practice, and more practice. I decided to compile this collection of rapid sketching tips to experience instant improvements in your drawing ability after completing them.
This collection of drawing guidelines is not intended to be a “catch-all” solution for drawing. They are merely a collection of suggestions that I have picked up along the road that have shown to be beneficial in my art.
1. Drawing Is A Skill
It follows from this that sketching is not a supernatural activity that certain individuals are born with the aptitude to perform. Anyone can learn to draw and become proficient at it. When it comes to skills, they can be taught and, more importantly, learned. If you want to learn to draw, improve your drawing skills, or draw like a professional, you can. Never remark, “I’m not good at drawing.”
2. Drawing Is 50% Observation
To draw is to see. What about when you weren’t even looking at what you were photographing? You’ve never done it. Despite this, many individuals believe that they can draw effectively without looking at anything. As a result, they grow frustrated by the lack of realism in their creations. Look at the thing before drawing it.
In truth, drawing requires a lot of observation of the subject matter. In my opinion, you should spend no more than half the time drawing your thing gazing at it. Observation is at least half of the drawing. Look at an elephant if you want to sketch one. Draw what you see once you’ve figured out why you view it that way.
It’s common knowledge that one approach to get an unfair advantage in an exam is to steal another student’s work. When you’re drawing, focus on the details of your subject. Just write them down. Here’s more information about sketching from life.
3. Use Resources
The following are a few visual cues to get you started: Photographic References. This one is similar to #2: if you can’t sketch something in person, gather images or, better yet, take photos of it to use as reference. Some individuals may turn their backs on me on this one. Simply said, it is not feasible to sketch anything from real life. So if you can’t be in the African Savannah to draw that lion, take a photo or three and use them as reference instead.
4. Look For Basic Shapes
Everything in the world can be reduced to its most fundamental outlines. You should strive to identify the basic forms present in your subject matter when you are studying it in depth. Generally speaking, these forms are rather simple to draw. After you’ve drawn the forms, you may create the outlines.
5. Make Use Of The Entire Value Range
The darkness or brightness of a color is represented by its value. As a result, light is important in determining value. Because we can’t see without light, we view objects based on their monetary worth. It has nothing to do with color. (Although the use of color is vital as well.) Create a value scale and then put it to use. Make certain that your drawing encompasses the whole range of values. The values on your value scale, in other words, are all of them. Using values, you may specify where the light source is located.
6. Make Use Of Line Quality.
The thickness or thinness is referred to as its line quality. A consideration for line quality is necessary if your drawing is a line drawing. Draw your lines thicker in some places and thinner in others, alternating between the two. This will add interest and variation to your drawing and make it more interesting. More information about the quality of the internet may be found.
7. Maintain Consistency
Keep your drawings consistent in style from beginning to end. If you begin your drawing with a free and gestural style, maintain it that way throughout. If your drawing starts tight and accurate, it should remain that way until the end. Make certain that the drawing appears to have been created by the same artist who created everything on the surface. The consistency and harmony of your drawing will be ensured by doing so.
8. Know Your Medium
Make certain that you are familiar with the proper approach to utilize the media that you will be utilizing to create your artwork. It’s OK to explore, but recognizing your limitations with a medium goes a long way toward improving your results.
9. Take a Deep Breath
It is not necessary to draw rigidly. In truth, this shouldn’t be the case. As an example, while attempting to outline the contour of an item, draw multiple light lines around the object.
10. Practice, Practice, And Practice
This is the most valuable piece of advice available. This holds regardless of the expertise. Keep a sketchbook with you at all times and sketch practically anything you see. Draw daily. When you cannot sketch, take a look at items and envision how you would depict them in your drawing. What kinds of forms can you find? What are the values that exist? What kind of media would I choose? The area between your ears can be used for drawing.
Summary
The likelihood of “finding” the correct line increases significantly as you draw more of them. (Purchasing many lottery tickets rather than a single ticket increases your chances of winning the lottery.) Attempt to hold the pencil differently than you normally do when writing. Instead of drawing with your wrist, draw with your shoulder by moving your entire arm as you make a mark.
Drawing Parts Of A Fish
Starting with the basics like body forms and fin location, you may move on to finer elements like fin rays and the number of scales on each fin. These characteristics can make a big difference in telling apart closely related species. You don’t have to follow the directions in any particular order, but they do provide some drawing techniques and recommendations for things to keep in mind as you’re drawing.
 The Head
Looking at the bluegill head, we see the contour of its jaw, cheekbones, and a little bit of detail in the eye, among other little features. Including a lighter ring of colour around the pupil in your design can give your fish a more lifelike appearance. Also, pay attention to the finer details of the head’s contours, including dips and fissures. Your drawing will have a more genuine appearance if you include these.
The Fins
A fish’s fins are critical to its overall appearance. There are some differences in fin morphology between cartilaginous and bony fish species. Bony fish such as gars and sturgeon, for example, may have soft fin-rays rather than spiny fin-rays since they are descended from ancient lineages of fish.
Sketch the soft fin rays with bifurcations for more realism. You may draw these rays onto your fish by taking note of their quantity, placement, and spacing. Consider the spines’ entry into the body and their placement about one other.
Any lines you don’t want to maintain should be erased from your fins, starting with the outlines. The remainder of your fish’s fins may be treated similarly to the first set. Drawing in a second pelvic fin behind and somewhat offset from the first helps enhance the realism of the design.
The Scales
Different kinds of fish scales are available. It is critical to understand the general form and anatomical structure of the scales on the fish you are sketching. The number, size, and distribution of scales (some on the skull, others not) can all help determine the species of a creature.
There may be more than one line on your fish; this is a common feature in many fish species. This system of canals on fish has sensors that detect water movement. The canal pores in the scales should be drawn on your fish if visible.
Then, working your way backward from the front of the body, fill each diamond with a more realistic rounded scale. Most scales have the front section lodged in the skin and covered by another scale, while the posterior portion is free.
Scale row lines will not correctly portray the areas around the head and stomach, so you may want to use some creative license. Just how you drew it, a fish with fins is a major accomplishment! Celebrate your success, but know that the same methods might be used for various fish species. You’ll find a few more information and links to related tutorials at the end of this article.
Summary
You’ve had enough of painting fin rays and scales by this point. Additional characteristics, such as cheek markings and shading, may be added to your fish as you continue to work on it. You may also use ink to trace your drawing and then paint or colored pencils to add more color. Consider copying the aesthetics of other artists whose work you admire. You may not see a specific effect until you see how other artists have achieved it.
Frequently Asked Questions - FAQs
People asked many questions about drawing a fish. We discussed a few of them below:
 What are the five basic qualities of drawing?
Identifying edges, understanding proportion, sketching in perspective, and using multiple color schemes are only a few basic drawing abilities.
 How do I teach my two-year-old to draw?
Make things easier for yourself. Don’t worry about creating elaborate farmyard sceneries; instead, focus on teaching your child to draw basic shapes and lines, one by one. Create outlines for your child to draw around using stencils and everyday items like dishes and cereal boxes.
 Why is it so difficult to draw?
When we look at something, our eyes don’t accurately represent what we’re drawing. Thus, drawing is difficult. The drawing gets much more challenging since we prefer to depict things as we see them rather than as they are. It’s difficult to learn how to perceive. Thus, sketching is difficult.
 What Colours do goldfish come in?
Red, orange, blueish-grey, brown, yellow, white, and black are some of the more common hues for common goldfish. Orange, white, red, orange, and white are frequent combinations, but the most prevalent is shiny orange.
 How do you draw an Infinity Cube?
To draw an impossible cube, just draw a square with a pencil. A little larger square should be drawn around this one to encircle the original one. When you’ve completed your first square, go back to the bottom left and continue the process until your new set of squares overlaps with your old one.
 Can you learn to draw on your own?
Yes, you can learn to draw independently, and it may be much simpler than you imagine. In certain cases, teaching yourself is the most effective method of learning.
 What is the significance of the koi fish?
This is why koi are typically connected with virtues such as fortitude, persistence, success, and bravery in folklore. The fish is also a representation of luck, success, wealth, and aspiration. Koi are also connected with longevity because of their long history and tenacious nature.
 Is it possible to learn to draw if I lack artistic ability?
Yes, drawing can be learned by everyone. Even if you don’t think you have any artistic ability, someone else could find what you’ve drawn beautiful. Drawing is a skill that may be learned just as easily as a natural gift. This may be learned, just like any other talent.
 When it comes to sketching, where should I start?
Shape drawing is one of the first skills to learn in the art of basic drawings. An artist needs to grasp these three basic shapes to better understand all forms while drawing.
 Which colors do you use on fish?
Live and frozen diets have varying degrees of effectiveness in improving the coloring of aquarium fish. Crustaceans like brine shrimp and frozen or freeze-dried meals like Mysis shrimp, krill, and other crustaceans can be used to add color to aquariums.
Conclusion
Enjoy this step-by-step fish sketching instruction. Beginners and experienced alike may use this guide to learn how to draw a fish and its complex aspects. As long as you’re a fan of the ocean and its gorgeous inhabitants, we’re confident you’ll enjoy yourself. It’s hard to find a better subject for an artist’s imagination than an ocean’s bounty of fish and other sea creatures. Because of their seeming simplicity, fish may appear like simple subjects to draw, yet the wide variety of fish species necessitates meticulous attention to detail.
Related Articles
https://howtodiscuss.com/t/learn-to-draw/142241
https://howtodiscuss.com/t/how-to-draw-a-dragon/100987
https://howtodiscuss.com/t/i-want-to-draw-a-cat-for-you/118381